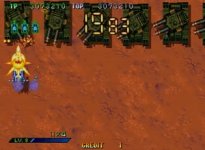
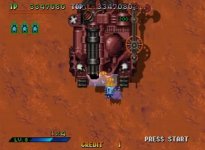
Recent 1cc playthrough by ResumeDPosition over on Shmups forum.
General Strategy
1) Get used to the controls. Practice until rotating in the correct direction becomes second nature, and bombs trigger when you need them.
2) Get used to attacks coming from all sides. This isn't a game where enemies only appear at the top of the screen. It takes a while to get used to watching all parts of the screen but is well worth it.
3) Having the right weapon at the right time makes the game much easier. (See weapon strategies below)
4) You can collide with enemies with no penalty. If you want to point-blank shoot them, snuggle up! You can get lots of extra tick-points on bosses as they enter the screen by point-blanking.
5) Rubbing up against terrain is also safe, however if the terrain traps you as it scrolls off the screen it will crush and kill you.
6) The turret rotates in 45 degree increments. If you rotate while firing, you can briefly hit enemies between these angles.
7) Bosses have several destroyable weapons on them. You can either target these sections for extra points, or just shoot the mass for a quicker kills.
Weapon Strategies
TUSK (Red orb) - This is the standard spread shot. I find it to be a bit weak in the early levels, but gets really nasty once you increase it to 8-10. Good for parts where enemies try to surround you, such as the mines on Stage C. The bomb is a giant red skull shaped laser beam, hell yeah!
FEELER (Yellow orb) - This is a penetrating laser beam. If you fire it while rotating the turret, it makes a sweeping motion that can catch enemies between diagonals. This weapon is a bit weak, however it can hit lots of enemies in a row. I've found a few good places for it, such as the lines of tanks on Stage B. The bomb is a group of yellow sperm homing lasers, whee!
FANG (Green orb) - This is the yo yo of doom. This weapon will cancel bullets when it is shooting out from the tank. Good for engaging enemies at medium range. If you're too close, it will pass over them and not do much damage. However if you can get it to rest on top of them, the damage is quite good. It can be hard to use because it this, but really spectacular when it works out. The bomb is an even bigger yo yo of doom, and hurts like hell!
HORN (Purple orb) - This shoots out a big tank shell, that makes a large explosion, and some short range orbs. The tank shell will cancel bullets, although the explosion does not. This weapon is really powerful for the early game, and does wicked damage against large targets that don't move much (such as bosses), especially if you get up close. The bomb fires homing orbs all over the place.
BEAK (Blue orb) - This fires a volley of missiles. Respectable damage at any range, maybe not quite as much as the yo yo or the explosive shot, but it's much easier to use because you don't have to worry about range. The bomb makes a giant blue skull shaped laser beam, hell yeah!
As you collect gems and weapon orbs, the weapon level will increase (bottom left) from 1 to 10. The bomb count is directly above the weapon level.
Scoring
Whenever you collect a medal, the next one to appear will be a higher value. Max value is 128,000. You do not have to clear the screen of medals to increase value. Medals reset in value if they fall off the screen, however they will "bounce" a while before doing so. Medals that come out of crates do not bounce though, and these can fall off the screen immediately. Medals reset in value at the end of each stage. For maximum medal values asap, try to destroy one target, collect the medal, then destroy another, etc.
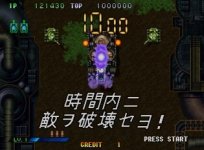
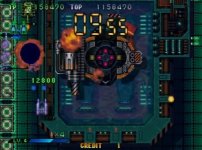
Midbosses award points based on how fast you kill them: (seconds remaining) x 10,000
Stage end bosses can be milked for extra points by destroying each extra gun turret. Watch for flashing parts as you shoot them in different areas.
Both mid and end bosses can be milked for extra tick-points as they enter the screen. Keep shooting them, even though it doesn't cause damage it will still give points.
If you let a powerup orb switch colors enough times, eventually it will turn black and float off screen. Collecting it while black gives 10,000 points.
Practice Stage
This is stage 1, for some reason called "practice".
Destroy the first three tanks, one at a time, collecting the medal before destroying the next.
When you shoot the gate, shoot it near one of the sides and press up into it. This way, you will collect one of the medals before they all appear and raise their value by two increments instead of one.
Next set of tanks destroy one at a time as before.
When you get to the crates on the right side of the screen, medal value should be at max (128,000).

The midboss is just a standard big tank. As it enters the screen, you can either destroy the supporting tanks to make things easier, or shoot the main tank for extra tick points. Classic risk vs. reward. No special strategies here.

The stage end boss is a total asshole the first few times you play him and don't know what to expect. Don't get discouraged if you gameover a few times here.
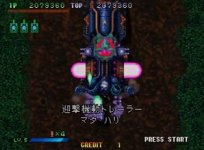
My strategy is to concentrate fire on the center gun first. This is the gun that makes the big horizontal explosion that's hard to keep an eye on. Once that part is gone, I prefer to focus on the left turrets. The pink homing wave-shaped bullets can be destroyed; I suggest concentrating fire on them when they are shooting. When the spinning gun with fast blue bullets pops out, I find it easier to dodge by staying below it (I have a harder time dodging diagonals).
If you want a fast kill, use the purple explosive weapon. If you want extra points, circle around to the back to hit the weapons on the other side.
Stage A
The first batch of tanks are a bit harder to kill one at a time for maxing out medals quickly due to the extra crossfire from ground turrets.

The first midboss is another giant tank, this one with a big axe on the right side!
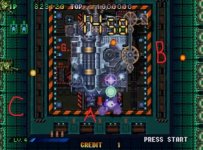
Point A: This is where the main gun shoots. Stand around here if you want to die.
Point B: The axe swings around the side and to the front. Don't stand around here when you see it start to twitch. The axe can be destroyed however with the bonus timer it may or may not be worth it.
Point C: The safest spot to attack from is the left side.

The second midboss is a big six-shooter revolver. This one first turns to face you, then shoots a very fast bullet. Just keep circling around it and it can't hit you.
After the second midboss, there will be a group of four crates with medals on the right. After that, there is another group of crates on the top. These are easy to miss if you're not watching for them.

The third midboss is a giant drill. I prefer to stay to the left of him. Nothing fancy to watch out for.

Hey, I've seen this guy before! My strategy for this rematch is to take out the bottom-left turret first. Next the center gun that shoots homing rounds. After that, more destructible homing rounds will come out, so I prefer to go to the bottom right to give myself extra time to shoot them down. When it dies, it splits in half, try not to get trapped by the wreckage!

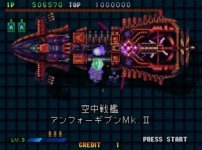
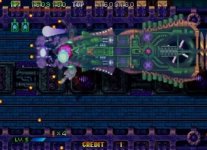
The Stage A boss has four parts in a chase scene. This fight is epic! As they enter from the bottom of the screen, little power armor guys launch off to give you something to shoot at. Or concentrate fire on the boss sections for extra tick points.
Note that most weapons are destroyable for bonus points. Also, you can squeeze behind each boss section and circle all the way around. This is very helpful if you ever feel trapped.
Part 1) Sawblades. Just keep your distance from the saw arms and it can't do much. You can shoot them off for extra points.
Part 2) Missile launchers. The missiles can be shot down (no extra points) so again just keep your distance.
Part 3) Giant cannon. You'll see a big "charge up" effect before it fires. Circle around, even around the back if needed, to get out of the way. The small turrets on the side seem to take tons of damage; good for milking if you like.

Part 4) The real boss fight starts here. The safest spot is directly below it as the side cannons and rolling fireballs can't hit you here. The side guns are worth a lot of points though, if you're willing to risk it.

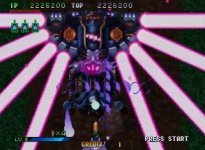
Just before it dies, some large wings fold out, which shoot thick laser beams. Again, I feel safest directly below the boss, as the lasers can't aim there. These wings can also be destroyed if you're feeling ballsy.
Stage B

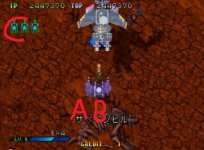
Right off the bat, you'll get this asshole plane. It shoots an aimed shot first, then a very fast spread of missiles. My strategy to not die here is to hang out at point A to get the aimed shot away from the center, and then just after it fires, immediately move to point B to avoid the missiles. Alternatively, go to one of the upper corners such as point C and the missiles won't hit you either.
A note on tanks in this level: Many enemies have cannons built into their hull, not on turrets. These enemies will fire very fast bullets, but only in the direction of these cannons. Engage these enemies from the side, away from where those cannons are pointed. If you need to cross in front of them, do not stop or you will die.
The large circular tanks have four such cannons on each corner. It's safer to fight them from the sides or top or bottom, only dodging when the center cannon fires.
And finally, this is the level you shoot infantry and light them ON FIRE. Hell yeah!

First midboss is two big tanks. These shoot a standard slow spread. Nothing too difficult, however the hangers next to them will spawn tanks. The yellow laser can damage lots of things simultaneously here.

The second midboss is a big row of tanks. Nothing too fancy, but the quantity of bullets can be dangerous. Again, a piercing laser can hit the whole line when shot from the side.

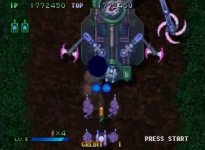
The stage end boss is a souped up version of the first stage A midboss. The trickiest part are the wavy pink lasers. When you see these come out, they will "lock on" to your current position. Move out of the way immediately, as once they start to move they are very fast. This has a bad tendency of pushing you into the main cannon fire or the axe blade, bomb if necessary.


