Hi All,
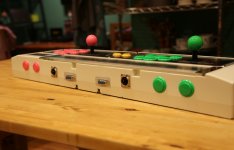
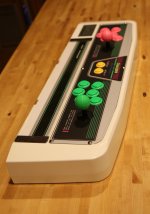
Just wanted to share the Madcatz Fightstick Pro TE mod I finally got around to doing this weekend – basically converting PS3 dedicated sticks for dual use also with a Neo Geo / supergun DB15 connection.
By way of background to the project, I was looking at getting some dedicated Neo Geo joysticks, but more often than not the condition of the used sticks on offer as well as prices didn’t support this course of action. Finally picked up a pair of new Madcatz Fightstick Pro TE on Amazon a month or two ago – played a bit with them on various PS3 titles and in the meantime I was thinking about the DB15 mod.
My first idea was to place a DB15 female connector on the back of the stick – once I got the connectors it quickly occurred that there wasn’t really a good place to put this on the back of the fightstick – basically the only place was inside the cable compartment but as I was looking to keep the PS3 functionality I needed that space to store the USB cable which fitted very snuggly into the compartment in standard form.
So I basically decided on:
- using an OEM style Neo Geo joypad plug and cable (available on ebay for about 8 dollars or so) to which I would then connect an DB15 extender cable.
- trying the solderless connection method – all required info on this page: http://setaoffice.com/2011/09/18/disassemble-a-mad-catz-fightstick-tournament-edition/ - really helpful and informative
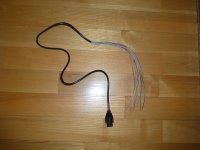
Anyway started of with the cable, stripped a lot of the black insulation of, and also stripped the individual cable ends exposing the copper:
Then opened up the joystick (very easy, just 4 big corner screws and about 6 small ones and the back plate can be removed no problem. Below are the internals with a few adnotations as to what is what:
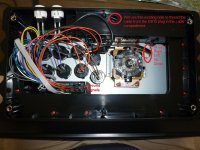
I then got a multimeter (affixed a sawing needle to one probe to be able to put it inside the plug holes) and basically going pin by pin located the corresponding cable ends and using the solderless method plugging them under the quick disconnects.
I did not have any problems with the cable breaking etc when sliding on the quick disconnects. Basically you can use either the buttons or the terminal block connectors – I used those on the buttons, since there was more room to work but also gave the terminal block a try by connecting ground there. The quick disconnects sit rather tight and pliers are required to remove these. After I did all the buttons I proceeded with the joystick. The place to get the joystick signals is the plug I marked in red on the above picture. Comes off very easy by just pulling on it with your fingers, as for inserting the wires it’s a little bit fiddly but entirely doable.
After connecting everything its worth plugging it into your system and if you have an MVS doing the hardware test and going into controller test and testing out the individual buttons etc. Sometimes after pulling on the quick disconnects the button gets stick in the down position, so check first that all buttons work normally – otherwise you may have a short circuit somewhere.
Last step is to tidy up the cables inside – I used some zip ties and duct tape to make sure nothing was loose and in the way.
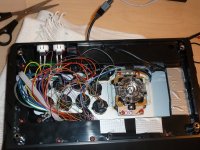
And finally the finished article:
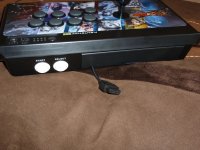
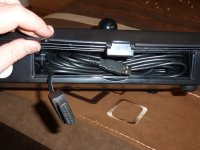
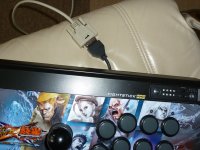
In case anyone is wondering - the solderless connections are VERY solid - they will not come off unless you go at them with a pair of pliers ('...and a blowtorch' ).
).
Everything works fine, finally I feel I am playing these games the way they are supposed to be played, the arcade stick really does add a lot to the overall experience / special feeling of the system.
If anybody is thinking of such a mod or has any questions let me know. Going slowly and methodically and including the time needed to get set up it takes about 2-3h but is generally doable with minimal risk of damaging something and with practically no extraordinary equipement required.
Any other comments etc welcome.
Just a question at this point – thinking of:
- changing the bottom row buttons to Neo Geo colours – what size and type do I need to ensure a plug and play fit?
- How do you change the artwork on these sticks?
All the best and thanks for reading
Just wanted to share the Madcatz Fightstick Pro TE mod I finally got around to doing this weekend – basically converting PS3 dedicated sticks for dual use also with a Neo Geo / supergun DB15 connection.
By way of background to the project, I was looking at getting some dedicated Neo Geo joysticks, but more often than not the condition of the used sticks on offer as well as prices didn’t support this course of action. Finally picked up a pair of new Madcatz Fightstick Pro TE on Amazon a month or two ago – played a bit with them on various PS3 titles and in the meantime I was thinking about the DB15 mod.
My first idea was to place a DB15 female connector on the back of the stick – once I got the connectors it quickly occurred that there wasn’t really a good place to put this on the back of the fightstick – basically the only place was inside the cable compartment but as I was looking to keep the PS3 functionality I needed that space to store the USB cable which fitted very snuggly into the compartment in standard form.
So I basically decided on:
- using an OEM style Neo Geo joypad plug and cable (available on ebay for about 8 dollars or so) to which I would then connect an DB15 extender cable.
- trying the solderless connection method – all required info on this page: http://setaoffice.com/2011/09/18/disassemble-a-mad-catz-fightstick-tournament-edition/ - really helpful and informative
Anyway started of with the cable, stripped a lot of the black insulation of, and also stripped the individual cable ends exposing the copper:

Then opened up the joystick (very easy, just 4 big corner screws and about 6 small ones and the back plate can be removed no problem. Below are the internals with a few adnotations as to what is what:

I then got a multimeter (affixed a sawing needle to one probe to be able to put it inside the plug holes) and basically going pin by pin located the corresponding cable ends and using the solderless method plugging them under the quick disconnects.
I did not have any problems with the cable breaking etc when sliding on the quick disconnects. Basically you can use either the buttons or the terminal block connectors – I used those on the buttons, since there was more room to work but also gave the terminal block a try by connecting ground there. The quick disconnects sit rather tight and pliers are required to remove these. After I did all the buttons I proceeded with the joystick. The place to get the joystick signals is the plug I marked in red on the above picture. Comes off very easy by just pulling on it with your fingers, as for inserting the wires it’s a little bit fiddly but entirely doable.
After connecting everything its worth plugging it into your system and if you have an MVS doing the hardware test and going into controller test and testing out the individual buttons etc. Sometimes after pulling on the quick disconnects the button gets stick in the down position, so check first that all buttons work normally – otherwise you may have a short circuit somewhere.
Last step is to tidy up the cables inside – I used some zip ties and duct tape to make sure nothing was loose and in the way.

And finally the finished article:


In case anyone is wondering - the solderless connections are VERY solid - they will not come off unless you go at them with a pair of pliers ('...and a blowtorch'
 ).
).Everything works fine, finally I feel I am playing these games the way they are supposed to be played, the arcade stick really does add a lot to the overall experience / special feeling of the system.
If anybody is thinking of such a mod or has any questions let me know. Going slowly and methodically and including the time needed to get set up it takes about 2-3h but is generally doable with minimal risk of damaging something and with practically no extraordinary equipement required.
Any other comments etc welcome.
Just a question at this point – thinking of:
- changing the bottom row buttons to Neo Geo colours – what size and type do I need to ensure a plug and play fit?
- How do you change the artwork on these sticks?
All the best and thanks for reading


