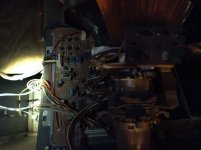
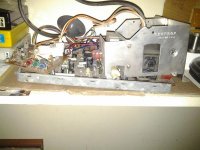
Fixing an original MVS-2 monitor

Joined
Mar 17, 2015
Posts
41
https://vimeo.com/123898619

I will be ordering a capkit shortly after Easter. As seen in the video link, I have bad contrast issues. This is probably due to the cabinet being all original and 25 years old. There are slight redraw lines due to me turning up the contrast and brightness in the back of the machine a bit. Turning back the contrast a bit makes them go away. Turning up the RGB levels resulting in a terrible buzzing that sounded like an old Commodore 64 power supply that's been dropped too many times X 100. Very loud, bug-zapper sound. Then, it went away when I put the color levels back to "normal"

Messing with the RGB knobs on the neckbeard didn't really change much according to the person looking at the screen while I twisted knobs.

I'd like to hear any input from someone who has corrected this sort of problem or general info/tips/questions on the machine in general. Other than mangled memory card slot pins and the marquee light not working even after a bulb replacement, this cabinet seems to be in great shape and I enjoy playing it even with the contrast issue.
 

Westcb

Give an Azn, A Break Here!,
Joined
May 17, 2012
Posts
1,190
https://vimeo.com/123898619


I will be ordering a capkit shortly after Easter. As seen in the video link, I have bad contrast issues. This is probably due to the cabinet being all original and 25 years old. There are slight redraw lines due to me turning up the contrast and brightness in the back of the machine a bit. Turning back the contrast a bit makes them go away. Turning up the RGB levels resulting in a terrible buzzing that sounded like an old Commodore 64 power supply that's been dropped too many times X 100. Very loud, bug-zapper sound. Then, it went away when I put the color levels back to "normal"


Messing with the RGB knobs on the neckbeard didn't really change much according to the person looking at the screen while I twisted knobs.


I'd like to hear any input from someone who has corrected this sort of problem or general info/tips/questions on the machine in general. Other than mangled memory card slot pins and the marquee light not working even after a bulb replacement, this cabinet seems to be in great shape and I enjoy playing it even with the contrast issue.

I have had a monitor like that where I couldn't quite get the colors right on a neo I just fixed up. I rejuvenated and still no change. Ended up just doing a tube swap and rebuilding the chassis. Like you said if the tube is 25 years old it may just be wearing down. Luckily most 25 inch tubes from the 90s fit great and in some cases won't even need a yoke swap. A cap kit is a great place to start and while you have the chassis out reflow everything else on the board for good measure. Hopefully you get lucky and get another 10 plus years out of that old workhorse. If it's a wells monitor and the fly back looks suspect at all might as well change that out too. A faulty fly can cause retrace lines as well but probably unlikely in what your describing. Unless of course that's what's buzzing when your adjusting the RGB... Could be on the way out.
 
Joined
Mar 17, 2015
Posts
41
Thanks for info, WestCB! Cool. I will start with the cap kit once it comes in the mail and I figure out how to get that board out. I was also suspecting the flyback after that godawful buzzing. This is my first cabinet, but I have a couple of good friends with a lot of experience with them and I have been reading up as much as I can.

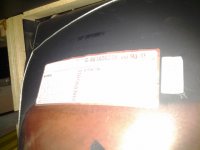
EDIT: I haven't gotten around to ID'ing the monitor brand yet, but here is an image I intended on using to do so (rotated 90 degrees):

20150328_203509.jpg
 
Last edited:

Westcb

Give an Azn, A Break Here!,
Joined
May 17, 2012
Posts
1,190
Thanks for info, WestCB! Cool. I will start with the cap kit once it comes in the mail and I figure out how to get that board out. I was also suspecting the flyback after that godawful buzzing. This is my first cabinet, but I have a couple of good friends with a lot of experience with them and I have been reading up as much as I can.

EDIT: I haven't gotten around to ID'ing the monitor brand yet, but here is an image I intended on using to do so (rotated 90 degrees):

View attachment 24181


Yeah removing is pretty easy, the neck board will just pull straight off, the anode cup (red wire from the fly back to the tube will unclip (ask your friends about discharging this although if it's a k7000 it will probably have a bleeder on it anyways and will discharge itself after a few mins) but of course rather be safe then sorry. The board itself should have a handful of Phillips screws holdding it in place as well and you may or may not have to cut a ground wire from the chassis to the tube. (You can reattach this with some crimped connectors, twist and use a wire cap etc) Disconnect rgb/sync wires (vertical molex pins running down the sideart be two connectors or 1 long one with all wires) and degause wires (2 prong from the wire wrapped all around the tube) from the chassis and your all set. About your marquee light if you changed the bulb and no dice most likely all you need is a new starter on the light fixture. Pretty cheap and can be picked up at a hardware store for a US cab. And you didn't state this but there is two knobs on the fly back you can try to play with as well to eliminate the retrace lines. It's the one marked screen, next to the one marked focus, just turn it slightly till the retrace goes away. Afterwards you should be able to crank up the brightness and contrast if needed. I would set both of those to half way while you try to dial that in. I wouldn't mess with the RGB on the neck board as its already been calibrated but if you choose to make sure you have a board with a good color test screen on it, the neo one is very basic and hard to dial in compared to a nice color bar one that shows more then just 4 boxes with solid colors.
 

Westcb

Give an Azn, A Break Here!,
Joined
May 17, 2012
Posts
1,190
Can you shoot a pic of the chassis, that pic I can just make out the monitor type A63 is 25 inch. The model number should be on the frame itself, sometimes it can be on the tube depending on the mfr.
 
Joined
Mar 17, 2015
Posts
41
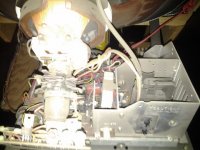
I can not right now and am about to go to bed, but here is another picture of the back which shows a bit more I took the other day:

image.jpg

edit: So screen and focus are on the bottom right. Which one is contrast, then?
 
Last edited:

Westcb

Give an Azn, A Break Here!,
Joined
May 17, 2012
Posts
1,190
I can not right now and am about to go to bed, but here is another picture of the back which shows a bit more I took the other day:

View attachment 24183

edit: So screen and focus are on the bottom right. Which one is contrast, then?


Looking at your pic I have doubts that's the chassis that monitor came with. It's not a wells from what I can see. Do you not have A remote board with those pots on it?

Kinda looks like a kortek possibly. Can't see with that pic but I would bet you have 5-6 pots on the lower left on the back of that chassis. Brightness and contrast are probably there. Would be right on the bottom. Trim pots can get very brittle so turn them lightly so you don't snap them off.
 
Last edited:
Joined
Mar 17, 2015
Posts
41
ok one more before bed :)

Yes, there is a small board you access under the joysticks. it has brightness and v-hold/position controls.
 
Joined
Mar 17, 2015
Posts
41
Here is another pic in the back of the monitor. I discovered the rgb dials seen on the board actually do something, in comparison to the rgb dials on the neck board. image.jpg

Turning up color levels a bit helped some, but I still do not see a "contrast" or "blackness" dial.
 
Last edited:

Westcb

Give an Azn, A Break Here!,
Joined
May 17, 2012
Posts
1,190
Well it definitely looks like a kortek the more pics u post. Have u been able to find a model number yet?
 
Joined
Mar 17, 2015
Posts
41
Hi Westcb! Sorry for the late reply. Holiday weekend and all.

So I just opened the back to turn the rgb on the chassis from roughly 3/4 to wide ass open. The colors are great now, but we've still got that annoying contrast issue. A good example would be the ref from Samurai Shodown. He's just a black enigma with no grey-ish details. Totally playable, just enough to nag me and make the cave areas in Metal Slug 2 hard to navigate (you just barely make out the vertical platforms with arrow signs on them).

At any rate, while I was in there I used the q-tips to wipe dust where I could make out what looked like the number on the monitor chassis:

I think this is the model#: it has a circle K looking logo, then says "KI-2-VO" (unsure if the I is a one or the O is a zero)

Also, on the side facing the wall of the machine is a sticker with a serial number: 94061826

Does this help ID? I think we can also say we have a definite yes on it being a Kortek, but I've yet to find a image in the internet that looks exactly like this one.
 
Last edited:
Joined
Mar 17, 2015
Posts
41
I think it's also safe to say we do have an issue with the flyback. It started buzzing again today when I fired it up and left on the multi-cart game selection screen (mostly black) for roughly 20 minutes.. I usually start a game right after plugging it in, so that was a new test.

From the PDF:

The flyback likes to develop pinhole arcing to the metal cage around it particularly near the focus control. Sometimes this can be fixed by cleaning the area thoroughly with 99% alcohol, drying, then applying clear silicone glue to the arcing area as an insulator. Let the silicone glue
dry for 24 hours before powering up the monitor. It helps to cut away about a ¼” of the metal all the way around the opening of the aluminum fly back cage where the focus and screen controls are. This helps with airflow around the fly back so it runs cooler and the fly back is less likely to
arc to the frame. I have marked the approximate are a to cut away in the picture. Then a view of 5 the finished enlarged opening of the cage mounted back on the chassis. In order to remove the cage to do this cutting, you have to remove the screws attaching the cage to the chassis and
unsolder the two vertical output transistors attached to the cage.

Do you recommend trying the glue technique first? I'd like to avoid removing the chassis until I'm ready to completely replace the caps. While I could probably do this and use a mini-grinder to make the mod to that piece of metal, this also has me wondering if perhaps I should replace the chassis altogether.
 
Joined
Mar 17, 2015
Posts
41
Apologies for the double-post, but wanted to add this other thread I just saw to this.

http://www.neo-geo.com/forums/showthread.php?237975-WTB-MS8-29-chassis

The squealing seems to always come back on after roughly 5 minutes now when the RGB levels are jacked up enough to compensate for the blackness level issue. I plan on trying the "toothpick trick" early tomorrow to take that god awful squaling coming from the flyback. I'd heard it described, but never pictured before.

Also, last night I turned the machine on and peered into the back when the squeal started in a pitch-black room with no light.. I could see no signs of electrical arcing, only the tube glowing.

The darkness issue I guess is likely a cap issue, I still plan on addressing that soon but having a couple of friends come over this weekend and wanted to just take care of the squeal for now.

As always, open to anyone's thoughts on all of this.
 

Westcb

Give an Azn, A Break Here!,
Joined
May 17, 2012
Posts
1,190
Apologies for the double-post, but wanted to add this other thread I just saw to this.

http://www.neo-geo.com/forums/showthread.php?237975-WTB-MS8-29-chassis

The squealing seems to always come back on after roughly 5 minutes now when the RGB levels are jacked up enough to compensate for the blackness level issue. I plan on trying the "toothpick trick" early tomorrow to take that god awful squaling coming from the flyback. I'd heard it described, but never pictured before.

Also, last night I turned the machine on and peered into the back when the squeal started in a pitch-black room with no light.. I could see no signs of electrical arcing, only the tube glowing.

The darkness issue I guess is likely a cap issue, I still plan on addressing that soon but having a couple of friends come over this weekend and wanted to just take care of the squeal for now.

As always, open to anyone's thoughts on all of this.


I have had to do the toothpick trick a few times now. I don't have any pictures to post but basically the metal piece that goes down kind of in the middle and folds over is where the sound comes from. You simply take a wooden toothpick and while the monitor is on squealing shove it into the small space and try to find the sweet spot. When you do it will be painfully obvious as the sound will go away. I have had a lose one before and I had to use 3 toothpicks to deaden the noise completely. You will not get zapped doing this assuming the fly back is not arcing of course. Once you get the toothpicks in place I put a small amount of hot glue on them to ensure they don't shift while reinstalling the monitor. Sounds like you are taking the right approach and trying a capkit first and focusing on that squealing fly back. These two attempts should only set you back a few bucks will hopefully solve your issue. Best of luck to you.

Edit: here's a pic from google images
b9c4f275a4372cb673c0199bbd2d3ff5.jpg
 
Last edited:
Joined
Mar 17, 2015
Posts
41
Yup, the toothpick trick did the job this weekend!

I thought at first it wasn't doing anything.. then I tried pushing the toothpicks down just a bit harder without breaking them, stood back, and a few seconds later it was gone. Played fine for hours after that.

Thanks, CB. I'll keep you updated when I'm ready to start replacing things.
 

Westcb

Give an Azn, A Break Here!,
Joined
May 17, 2012
Posts
1,190
Yup, the toothpick trick did the job this weekend!

I thought at first it wasn't doing anything.. then I tried pushing the toothpicks down just a bit harder without breaking them, stood back, and a few seconds later it was gone. Played fine for hours after that.

Thanks, CB. I'll keep you updated when I'm ready to start replacing things.


Glad it worked!
 
Joined
Mar 17, 2015
Posts
41
Since the last post..

Eventually the squealing noise from the flyback came back, and was louder than ever. I could never make it go away after that. Shortly after that, I ordered a capkit from Syracuse Semiconductors and a new flyback from Dönberg Electronics. I've had the new caps a while, the flyback arrived yesterday, and I have removed the chassis and started to remove the "cage" around the flyback.

CHqtsalXAAAWwTG.jpg

P.S. : Can a mod or admin move this thread to the "Monitors and Displays Tech Support" section?
 

mikejmoffitt

Mickey's Coach
Joined
Feb 6, 2014
Posts
578
Sounds like you should turn up the brightness a bit. On the Neo-Geo test grid screen, first dial down the contrast a bit (the R, G, B pots - Contrast, here, is a fancy word for Gain.) Next, bring up the Brightness (more or less a DC offset) until the black shows faintly as a dark grey. If it isn't grey but is tinted, use the RGB dials to balance the color. Then, bring down the brightness just enough so black doesn't show up as a dark grey, but is really black. Then, up the contrast until it looks nice.
 
Joined
Mar 17, 2015
Posts
41
Hours of adjusting the gain, cutoff, and brightness yielded better results but never quite right. I was always missing random colors. Plus, once the flyback gave out I had no choice but to tear it down and begin working on it.

I got the cage off and marked for cutting last night, as well as about half the old solder off the old flyback.
 
Last edited:

mikejmoffitt

Mickey's Coach
Joined
Feb 6, 2014
Posts
578
Hours of adjusting the gain, cutoff, and brightness yielded better results but never quite right. I was always missing random colors. Plus, once the flyback gave out I had no choice but to tear it down and begin working on it.

I got the cage off and marked for cutting last night, as well as about half the old solder off the old flyback.

Once the parts are replaced and the board is capped, adjusting the settings will probably be much more effective than before.
 
Joined
Mar 17, 2015
Posts
41
I can't seem to find the right flyback for this monitor chassis. That is unfortunate, because the caps have all been replaced. But after ordering and waiting for 2 flybacks of the wrong type (per the infamous Kortek repair guide) and not finding the correct one, I give up!

I'll be ordering one of these universal chassis boards soon, though not nessasarily from this site:
https://www.classicgamerooms.com/arcade-parts/monitors/universal-monitor-chassis-25-inch-detail.html

That should work for the 25-inch screen in this cabinet. I think. Any objections?
 
Joined
Mar 17, 2015
Posts
41
Test on monitor yoke yielded 28+ Ohm on vertical. Way out of the scale of 6-12 Ohm required for the "universal monitor chassis". That ain't gonna work.

Now I will try to find an appropriate Wells Gardner chassis and yoke replacement while continuing to look for the right flyback for this stupid Kortek.
 
Last edited:
Top