You are using an out of date browser. It may not display this or other websites correctly.
You should upgrade or use an alternative browser.
You should upgrade or use an alternative browser.
Blast City Club
- Thread starter clutch
- Start date
- Joined
- Jan 7, 2013
- Posts
- 4,223
Andy's a pretty reputable guy, I'm sure he'll sort that out for you if you let him know.
+1
")
grendelrt
Super Spy Agent

- Joined
- Apr 22, 2014
- Posts
- 623
Figured I would write this up for anyone in the future that wants to retrofit a 2933 to a 2930 tube. This also might be true of a 2931 on a 2930 tube, but I cant confirm that. Huge thanks to grantspain over on AO, he helped me figure out the heater issue.
Retrofitting MS-2933 to a MS-2930 Tube
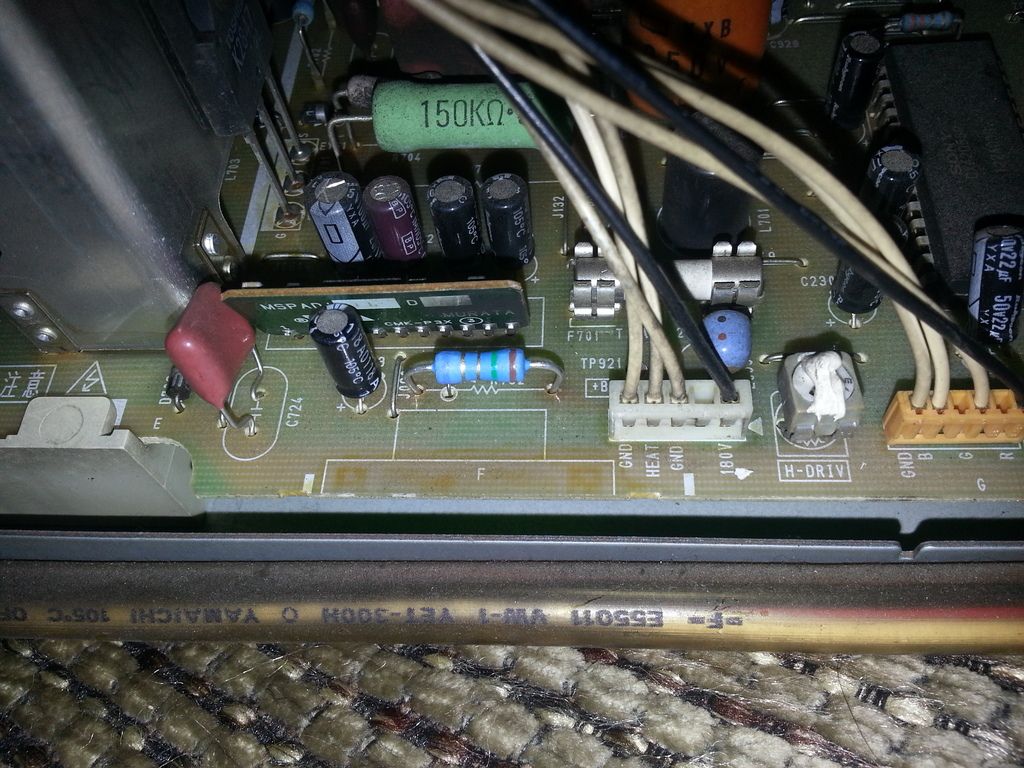
I dont know if this is true for all tubes, but I have had a confirmation from 2 other people that this issue was present for them, so I am guessing it is. When putting a 2933 chassis on a 2930 tube, everything is compatible but the picture is too dim. This is from a mismatch on the heater resistor from the chassis to the tube. Replacing the resistor can brighten the picture. On my chassis this was resistor 732 and it was a 2.9ohm resistor. I replaced it with a 1.5 OHM Fusible 1 watt resistor (http://www.digikey.com/product-detail/en/0/989-1256-1-ND). So far the picture looks about right, this is the same resistor used in a MS9 (thanks to grantspain for this info!!) EDIT: Ended up swapping to a 2.2ohm resistor after a week, picture I think was a little too bright!
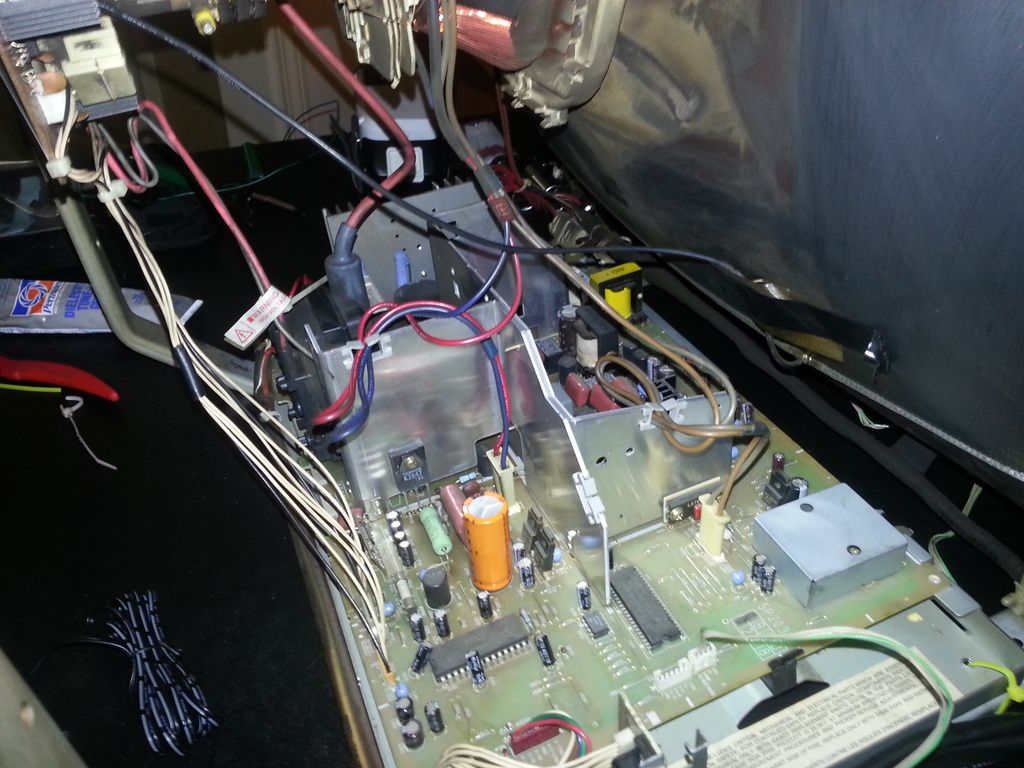
The chassis itself will mount inside the frame fine. You cannot use the metal plating that the black plastic frame mounts to. Instead you can mount the metal frame that the 2933 is mounted to (no plastic frame with the 2933) instead. So make sure you chassis has the metal frame.
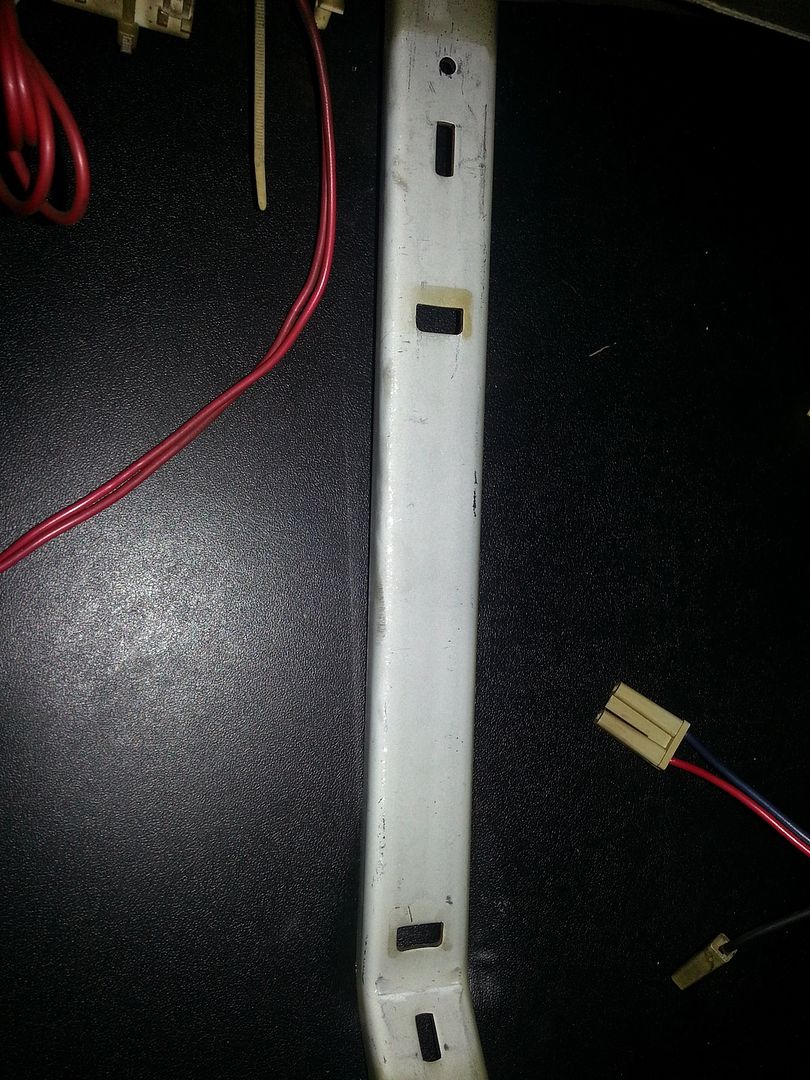
One of the hooks on the bottom of the chassis will fit in the left side of the rail on the tube. On the other side one hole lines up with a slot in the rail on the right, you can use a bolt or something here to hold down the right side.
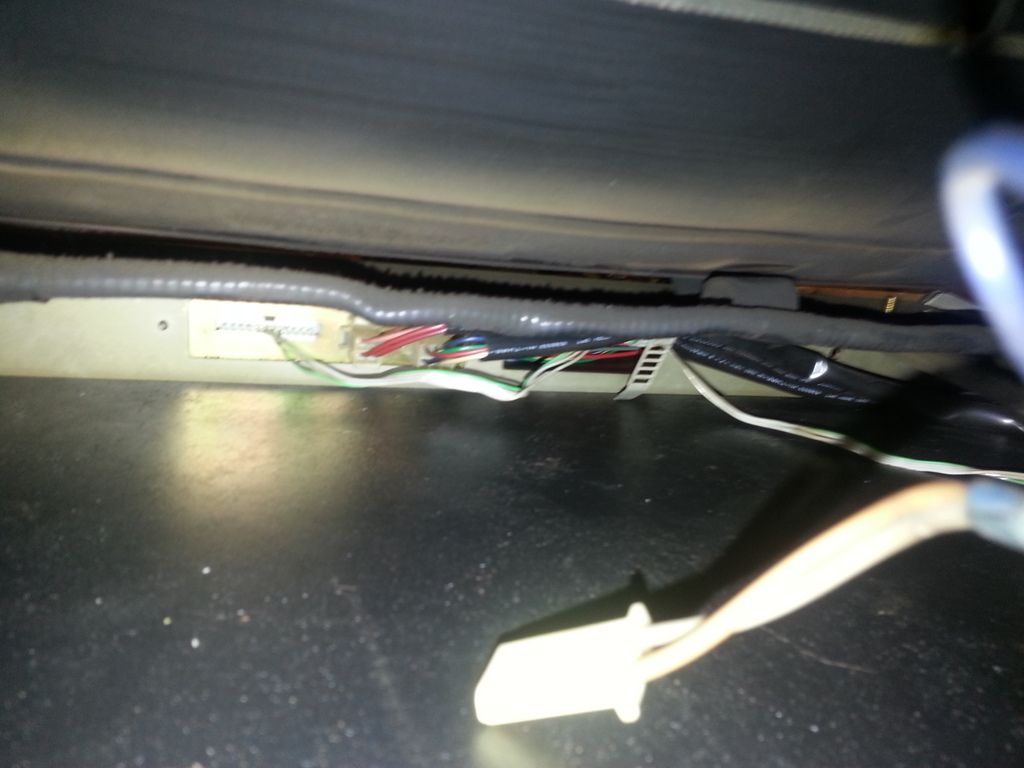
The control boards are different, you will need to unhook the old board from the front of the monitor and remove the piece that is slotted in below the monitor. Then attach the wire that runs from the chassis to the tube, this slots in on the back of the monitor below it.
Next just hook up everything like you normally would, everything has a color coding that is labeled on the chassis.
WALLA, autosync tri res for us pleebs
MS 2933 (no tuning of picture)
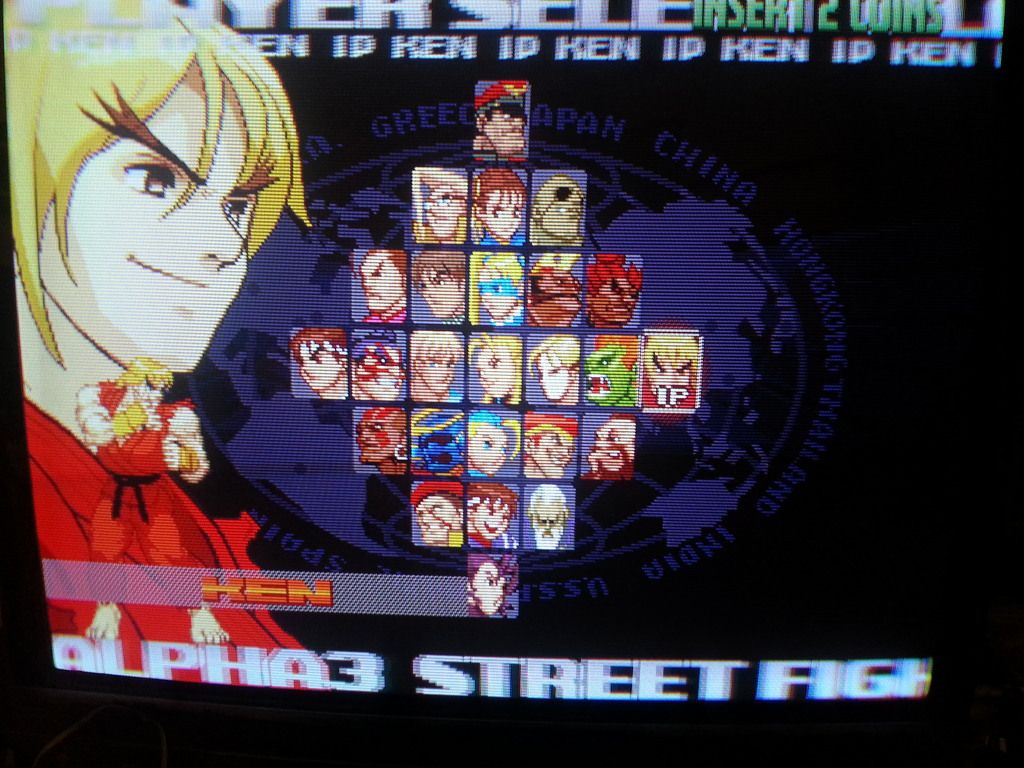
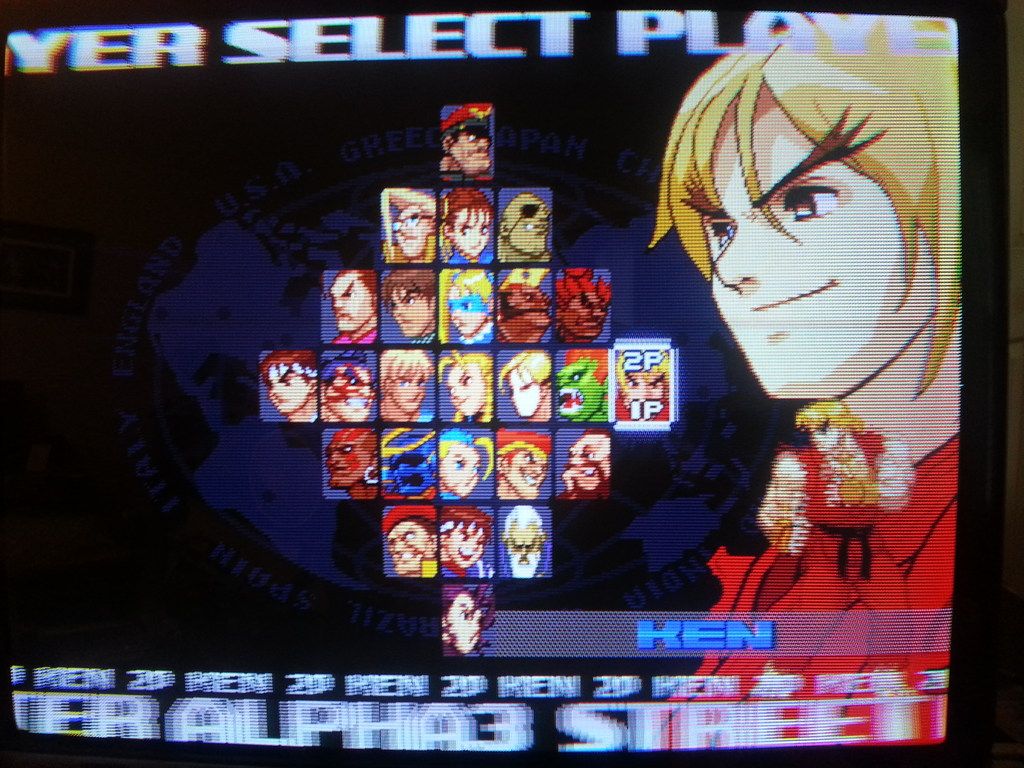
MS2930 (no tuning of picture)
Retrofitting MS-2933 to a MS-2930 Tube
I dont know if this is true for all tubes, but I have had a confirmation from 2 other people that this issue was present for them, so I am guessing it is. When putting a 2933 chassis on a 2930 tube, everything is compatible but the picture is too dim. This is from a mismatch on the heater resistor from the chassis to the tube. Replacing the resistor can brighten the picture. On my chassis this was resistor 732 and it was a 2.9ohm resistor. I replaced it with a 1.5 OHM Fusible 1 watt resistor (http://www.digikey.com/product-detail/en/0/989-1256-1-ND). So far the picture looks about right, this is the same resistor used in a MS9 (thanks to grantspain for this info!!) EDIT: Ended up swapping to a 2.2ohm resistor after a week, picture I think was a little too bright!

The chassis itself will mount inside the frame fine. You cannot use the metal plating that the black plastic frame mounts to. Instead you can mount the metal frame that the 2933 is mounted to (no plastic frame with the 2933) instead. So make sure you chassis has the metal frame.
One of the hooks on the bottom of the chassis will fit in the left side of the rail on the tube. On the other side one hole lines up with a slot in the rail on the right, you can use a bolt or something here to hold down the right side.

The control boards are different, you will need to unhook the old board from the front of the monitor and remove the piece that is slotted in below the monitor. Then attach the wire that runs from the chassis to the tube, this slots in on the back of the monitor below it.

Next just hook up everything like you normally would, everything has a color coding that is labeled on the chassis.

WALLA, autosync tri res for us pleebs
MS 2933 (no tuning of picture)

MS2930 (no tuning of picture)

Last edited:
300wins
Conan The Librarian,
- Joined
- May 29, 2003
- Posts
- 1,631
Figured I would write this up for anyone in the future that wants to retrofit a 2933 to a 2930 tube. This also might be true of a 2931 on a 2930 tube, but I cant confirm that. Huge thanks to grantspain over on AO, he helped me figure out the heater issue.
Retrofitting MS-2933 to a MS-2930 Tube
I dont know if this is true for all tubes, but I have had a confirmation from 2 other people that this issue was present for them, so I am guessing it is. When putting a 2933 chassis on a 2930 tube, everything is compatible but the picture is too dim. This is from a mismatch on the heater resistor from the chassis to the tube. Replacing the resistor can brighten the picture. On my chassis this was resistor 732 and it was a 2.9ohm resistor. I replaced it with a 1.5 OHM Fusible 1 watt resistor (http://www.digikey.com/product-detail/en/0/989-1256-1-ND). So far the picture looks about right, this is the same resistor used in a MS9 (thanks to grantspain for this info!!)
The chassis itself will mount inside the frame fine. You cannot use the metal plating that the black plastic frame mounts to. Instead you can mount the metal frame that the 2933 is mounted to (no plastic frame with the 2933) instead. So make sure you chassis has the metal frame.
One of the hooks on the bottom of the chassis will fit in the left side of the rail on the tube. On the other side one hole lines up with a slot in the rail on the right, you can use a bolt or something here to hold down the right side.
The control boards are different, you will need to unhook the old board from the front of the monitor and remove the piece that is slotted in below the monitor. Then attach the wire that runs from the chassis to the tube, this slots in on the back of the monitor below it.
Next just hook up everything like you normally would, everything has a color coding that is labeled on the chassis.
WALLA, autosync tri res for us pleebs
MS 2933 (no tuning of picture)
MS2930 (no tuning of picture)
Good job with the write up grendelrt. Glad you got it all sorted out.
- Joined
- Apr 20, 2013
- Posts
- 2,557
Figured I would write this up for anyone in the future that wants to retrofit a 2933 to a 2930 tube. This also might be true of a 2931 on a 2930 tube, but I cant confirm that. Huge thanks to grantspain over on AO, he helped me figure out the heater issue.
Retrofitting MS-2933 to a MS-2930 Tube
I dont know if this is true for all tubes, but I have had a confirmation from 2 other people that this issue was present for them, so I am guessing it is. When putting a 2933 chassis on a 2930 tube, everything is compatible but the picture is too dim. This is from a mismatch on the heater resistor from the chassis to the tube. Replacing the resistor can brighten the picture. On my chassis this was resistor 732 and it was a 2.9ohm resistor. I replaced it with a 1.5 OHM Fusible 1 watt resistor (http://www.digikey.com/product-detail/en/0/989-1256-1-ND). So far the picture looks about right, this is the same resistor used in a MS9 (thanks to grantspain for this info!!)
The chassis itself will mount inside the frame fine. You cannot use the metal plating that the black plastic frame mounts to. Instead you can mount the metal frame that the 2933 is mounted to (no plastic frame with the 2933) instead. So make sure you chassis has the metal frame.
One of the hooks on the bottom of the chassis will fit in the left side of the rail on the tube. On the other side one hole lines up with a slot in the rail on the right, you can use a bolt or something here to hold down the right side.
The control boards are different, you will need to unhook the old board from the front of the monitor and remove the piece that is slotted in below the monitor. Then attach the wire that runs from the chassis to the tube, this slots in on the back of the monitor below it.
Next just hook up everything like you normally would, everything has a color coding that is labeled on the chassis.
WALLA, autosync tri res for us pleebs
MS 2933 (no tuning of picture)
MS2930 (no tuning of picture)
Excellent stuff, glad you got it sorted out and shared your findings.
Did you end up getting the 2930 chassis working too?
grendelrt
Super Spy Agent
- Joined
- Apr 22, 2014
- Posts
- 623
Excellent stuff, glad you got it sorted out and shared your findings.
Did you end up getting the 2930 chassis working too?
I did, that second screen is from it after I recapped it. There is a slight issue where the screen will slightly shrink then recover on transition screens. Not sure if it's related to the vertical ic I had to solder back in. I boxed it up for now, was tired of looking at chassis hehe.
- Joined
- Apr 20, 2013
- Posts
- 2,557
I did, that second screen is from it after I recapped it. There is a slight issue where the screen will slightly shrink then recover on transition screens. Not sure if it's related to the vertical ic I had to solder back in. I boxed it up for now, was tired of looking at chassis hehe.
Cool, I hear that. You've got me wanting to test my new chassis now...
grendelrt
Super Spy Agent
- Joined
- Apr 22, 2014
- Posts
- 623
Cool, I hear that. You've got me wanting to test my new chassis now...
Well if you decide to, it's really not that bad. Hardest part is pulling the monitor. I went ahead and replaced my speakers while the monitor was out.
- Joined
- Apr 20, 2013
- Posts
- 2,557
Well if you decide to, it's really not that bad. Hardest part is pulling the monitor. I went ahead and replaced my speakers while the monitor was out.
Pulling the monitor out definitely sucks. I had a buddy help me tate mine and the experience made me decide it would remain a vert cab.
If I pull it to test the backup chassis I'll probably go ahead and try to fix its minor convergence issues. Anyone know where to get convergence strips these days?
- Joined
- Jan 7, 2013
- Posts
- 4,223
Pulling the monitor out definitely sucks. I had a buddy help me tate mine and the experience made me decide it would remain a vert cab.
If I pull it to test the backup chassis I'll probably go ahead and try to fix its minor convergence issues. Anyone know where to get convergence strips these days?
There was a dude making some, but I don't know if he does anymore:
http://www.ebay.com/itm/Reproduction-Convergence-Strip-x10-Monitor-Arcade-/161203258775
- Joined
- Jan 7, 2013
- Posts
- 4,223
If your coin mech takes 100y or 50y coins already, it's really easy to make it take nickels. As a bonus, usually once it's set for nickels it'll take 50y coins too.
http://wiki.arcadeotaku.com/w/AD-81P_Coin_Acceptor has the adjustments.
Also, on most games the service button will add credits anyway.
http://wiki.arcadeotaku.com/w/AD-81P_Coin_Acceptor has the adjustments.
Also, on most games the service button will add credits anyway.
Chempop
BESTEST Buttrider in chat.Officially No.10 at Schm
- Joined
- Oct 12, 2010
- Posts
- 3,024
Sometimes I set games to free-play, but other times you need to have credits activated to enter codes and such (batrider and dimahoo for starters). For those games I typically tap the actuator wire on the coin mech because i’m too lazy (broke) to stock tons of yen coins.
Pasky
Fug:DDDDD,
- Joined
- May 5, 2013
- Posts
- 2,844
Sometimes I set games to free-play, but other times you need to have credits activated to enter codes and such (batrider and dimahoo for starters). For those games I typically tap the actuator wire on the coin mech because i’m too lazy (broke) to stock tons of yen coins.
Can't you set the codes for bat rider with the dip switches? I'm pretty sure I just have all the menus unlocked via dips on mine.

Chempop
BESTEST Buttrider in chat.Officially No.10 at Schm
- Joined
- Oct 12, 2010
- Posts
- 3,024
So I’ve decided that the blast’s mono amp is complete garbage and I’m considering how to play MVS games in it with the stereo amp. I usually use either CPS2 or xbox360 in stereo, and it’s a WORLD of difference.
Are their mods that can be done to a 1-slot, or should I look into getting a multi-slot and MVS>Jamma adapter?
Thanks in advance!
Are their mods that can be done to a 1-slot, or should I look into getting a multi-slot and MVS>Jamma adapter?
Thanks in advance!
- Joined
- Jan 7, 2013
- Posts
- 4,223
I think your best bet would be a 1 slot with a headphones connector. MVS puts out amplified audio on the edge connector, and while I've heard that some people have run amplified audio into the blast's stereo amp, the connector/manual says "line." I'd think that the headphones connection would be a good line level (or at least a lot closer to it) signal to send to the stereo amp.

- Joined
- Mar 9, 2001
- Posts
- 1,452
It depends on your board revision. The MV-1, MV-1F, and MV-1FS support stereo through a PCB connector. I purposely got one of these for my cab for this reason. Kid Panda made me the necessary wiring.So I’ve decided that the blast’s mono amp is complete garbage and I’m considering how to play MVS games in it with the stereo amp. I usually use either CPS2 or xbox360 in stereo, and it’s a WORLD of difference.
Are their mods that can be done to a 1-slot, or should I look into getting a multi-slot and MVS>Jamma adapter?
Chempop
BESTEST Buttrider in chat.Officially No.10 at Schm
- Joined
- Oct 12, 2010
- Posts
- 3,024
It depends on your board revision. The MV-1, MV-1F, and MV-1FS support stereo through a PCB connector. I purposely got one of these for my cab for this reason. Kid Panda made me the necessary wiring.
Thanks for the tip! Funny you mention it, I almost PMed KP since I remember him making some stereo cables for people, I couldn’t remember exactly what for though. Unfortunately I have a 1B and 1FZ <insert sad trombone>... I might try to do a trade for one with stereo support.