Metal Slug 5 bootleg Cart improvement? Gadgetuk

Broomfield

New Challenger
Joined
May 18, 2016
Posts
57
Wondering if you can help me "Gadgetuk" with this "metal slug 5" bootleg cart, opened it up and the pcb's look abit of a mess, flux everywhere but it works.

Every now and then when playing the cart the sounds goes abit crackly every so often, worried that the cart could die or not last very long as these carts are not made particularly well.
I guessed there could be a way to improve it by adding any capacitors, voltage regulators etc like in the 161 or 138 carts improvement via Gadgetuk youtube videos?

If you could let me know that would be fantastic :)

here is some pics of the board

MS5B1.jpgMS5B2.jpgMS5B3.jpgMS5B4.jpg
 

madman

Blame madman, You Know You Want To.,
Joined
Jun 1, 2007
Posts
7,518
It's a boot, you're gonna have issues w/it.
 

JoeAwesome

I survived Secret Santa, It wasn't Easy.,
Joined
Feb 19, 2016
Posts
3,141
And not all boots are the same. The quality could vary even with the same bootlegger making them.
 

gusmoney

Unsure if You Asked, For a custom Rank, But Hell,
10 Year Member
Joined
Nov 3, 2014
Posts
1,852
Yeah, but he's a pervert, Dude.
 

Sypth

Mr. Big's Thug
Joined
Nov 14, 2010
Posts
206
If it works, it works. Best you could do is reflow solder where it looks janky, clean it down with some flux cleaner, and shine up those pins with deoxit, or an eraser.
 

GadgetUK

Ace Ghost Pilot
Joined
Sep 27, 2013
Posts
1,323
It looks to have the same problem as the n in 1 carts - no 47pF caps SDRMPX and SDPMPX lines. Try connecting a 47pF cap between the connection to ground. You can either look at the mvs cart pin out to see which pins to connect them to, or see the 161 in 1 guide for those two caps.

The other possibility is corrupt or faulty VROMs, but I reckon it's the lack of the two caps.


Edit: there looks to be 3 cap positions on bottom left of prog board - 1 or 2 of those might be connected to the SDRMPX or SDPMPX lines.

Amazed the cart works at all - so few caps.
 
Last edited:

Broomfield

New Challenger
Joined
May 18, 2016
Posts
57
If it works, it works. Best you could do is reflow solder where it looks janky, clean it down with some flux cleaner, and shine up those pins with deoxit, or an eraser.

Thanks I'll do that, was just thinking if I need to change or add any of the components? As every now and then I get a sound crackle when playing it, was thinking more of a long term protection or preventative protection on the board.
 

Broomfield

New Challenger
Joined
May 18, 2016
Posts
57
Thanks I'll do that, was just thinking if I need to change or add any of the components? As every now and then I get a sound crackle when playing it, was thinking more of a long term protection or preventative protection on the board.

Thanks Gadgetuk, first thing I did was clean off all the flux off the board. It now looks crystal clean. Your right its a very bare looking board which made me think if I needed to add anything to it.

I have x2 47pF ceramic caps that I could attach to those SDRMPX and SDPMPX lines, I'll attach one of the cap legs to pin 47 and the other to ground. The bottom left empty cap position actually goes to pin 55, I'll try and trace that to the altera chip via a continuity test and see if I can find it. Which number pin on the altera max chip is the one I need?

Also is it worth adding any capacitors to the board in any of the empty spots? or any "AMS1117" anywhere? I noticed there is quite afew diodes, should I remove any of them and replace with a voltage regulator AMS1117 ? or any electrolytic caps.

thanks very much for your help
 
Last edited:

GadgetUK

Ace Ghost Pilot
Joined
Sep 27, 2013
Posts
1,323
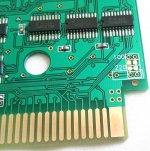
On the other cap positions that go to VCC rails - eg. on prog board C2, C3, CVCC - put 100nF caps there. C1, C4, C5 - not sure, you would have to work out what they are connected to. I would assume if one end of the cap position at C1, C4 and C5 connects to ground, then you could fit 100nF caps there too. Note two diodes on the char board that you could swap out for a 3.3v regulator - but consider the recent article related to mismatch between 3.3v logic and 5v logic and there's a question around whether its better to reduce the voltage to 3.3v to protect the cart, vs reducing to 3.3v and driving the neo chipset harder due to the 3.3v chips clamping more voltage = more current. Personally I would fit a 3.3v regulator, but I cannot 100% suggest its safer than using the diodes.

Note that the prog board has 1 diode - this reduces the 5v to ~4.3v - a similar technique used on the 161 in 1, where they try to find a middle ground between 3.3v and 5v, presumably because the CPLD on there is 5v but they need to connect to 3.3v flash chips or something (speculation). All very messy =/ So regards voltage on the prog board I wouldn't bother with a regulator - chances are at 3.3v that CPLD won't work properly (like on the 161 in 1 if you don't feed one of the CPLDs on there with 4.3v.

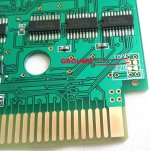
On the char board there are pads on top and underneath that you could probably fit 100nF caps - again check that one side is ground, and perhaps test after fitting one at a time to be sure. On the top side of the char board there are some handy markings and sizes, eg. 100pF, and then a 100 and 220 (not sure if nF or pF.

In summary, I would fit a AMS1117 3.3v regulator to the char board (and remove the two diodes), fit as many 100nF caps in any bypass spots (between a VCC rail and ground), add 2 x 47pF caps between SDRMPX and SDPMPX and ground, perhaps add a 100uF electrolytic on the 5v input to the regulator and a 47uF or 22uF on the 3.3v side of the AMS1117 regulator. Clean up the boards and hope for the best. But I suspect your sound issue will be the 2 x 47pF caps required. It could also be that the 4.3v on the prog board has finally killed one of the VROMs, although they might be 5v parts not 3.3v - no idea. The 4.3v might be purely for the CPLD maybe, in which case maybe the VROMs are OK and its the CPLD that is just undervoltaged and just happens to work at 4.3v.
 

Broomfield

New Challenger
Joined
May 18, 2016
Posts
57
Thanks very much for the information Gadgetuk

I've done the mods to the PROG board, is it looking all ok? Please let me know if I have done anything wrong. I added 100nF caps in the empty pads labeleed "C1, C2, C3, C4, C5, CVCC" as I checked each pad to see if one of the sides of those pads connected to ground, and they all did. Then I attached the x2 47pF caps to the pins 55 and 47 to help the sound issue. The only part of the PROG board I've left is the back side, I've left that single diode where it is, is that right?

I've just started on the CHA board, the furthest I've got is remove the two diodes, but since then I've got abit confused =/

Please can you let me know, (insert a picture if possible) to show me the positions where I need to connect the regulator and the electrolytic caps etc. If you could do that for me I'd be very much appreciated. I also checked the empty pads on the back of the CHA board aswell (there is x4 of them) I did a continuity test and each of those pads connect straight to ground, both sides of the pads connect to the ground. Does that mean should I connect 100nf caps to those x4 pads aswell on the back of the CHA board?

Sorry for all the questions, I just need help if you can show me where i put the 100uF electrolytic on the 5v input to the regulator and also the 47uF on the 3.3v side of the AMS1117 regulator. Any info would be great, but some pictures with markings that you did last time for me would be fantastic :)


thanks very much

here is the pic of what I've done so far


PROG BOARD - Added 100nf caps in empty pads. Attached 47pf caps to pin 55 + 47.
1.jpg

CHA BOARD - removed x2 diodes, unsure where to attach regulator and electrolytic's.
2.jpg
 
Last edited:

GadgetUK

Ace Ghost Pilot
Joined
Sep 27, 2013
Posts
1,323
All you need to do is look at the pinout of the AMS1117 (make sure you buy the 3.3v version), then solder the ground to a ground somewhere (maybe right pin of the 2 pin point next to where I marked 3.3v (and you might be able to shove an electrolytic in that position too. Feed 5v into the input of the regulator, and take the 3.3v output and join to where that top diode connection used to be (as marked 3.3v).
2a.jpg
 

GadgetUK

Ace Ghost Pilot
Joined
Sep 27, 2013
Posts
1,323
If both sides of those pads (that look like cap positions) are connected to ground - they aren't cap positions, maybe just an extension of the ground plane.

BTW - your sound problems would have gone away already after doing the prog board if the caps were the cause (assuming PCM crackles etc).

Regards the two electrolytics, put say 100uF say between 5v and ground, and put a 22uF or 47uF between 3.3v and ground. Just check your polarity.

Double and tripple check your AMS1117 is correctly connected with regards to the ground, input (5v), and output (3.3v) before testing.
 
Last edited:

Broomfield

New Challenger
Joined
May 18, 2016
Posts
57
Thanks so much for the info Gadgetuk

I did was what you suggested, I put 100nf caps in many of the empty pads on the CHA board, I checked the pads to see that one side would connect to ground so I only added the 100nf caps to those ones. I left out the ones on the bottom right, should I add a 100nf on the 100 postion there or just leave it?

I did the regulator mod as you suggested, I attached the top of the 3.3v regulator to the top pad and then one leg to ground and then the other leg to a wire that goes to the 5v pad. In regards to the electrolytic capacitors the cap value next to the 3.3 is a 47uf 16v and the one next to the 5v wire is a 100uf 16v, Is that ok?

Please let me know if it all looks ok, or if I've made any mistakes at all. This is still all a learning process for me so I get easily confused =/

i just want to make this cart as stable as I can, as I love the game.

Thanks very much


Added 100nf caps to alot of the empty pads, checked to see if those pads had a ground connection
ms5 fix 2.jpg


Added the 3v3 regulator and added a wire to atttach to 5v, added the two caps.
One next to 3.3v line is 47uf 16v, and the one next to the 5v pad is 100uf 16v. is that correct?
ms5 fix 1.jpg
 
Last edited:

GadgetUK

Ace Ghost Pilot
Joined
Sep 27, 2013
Posts
1,323
The light blue cap on the right - it's left hand connection should connect to ground! That's not a ground! Perhaps scratch the solder mask off the large ground plane surrounding that area on the outside of where the diode was - that will be ground.
The output of the regulator looks correct, but I would check that solder point is not shorting to the ground area that surrounds that pad. And the 5v input, I would put some insulation tape under that connection on the regulator, it looks like its shorting to the underneath - is it floating as it should be on that bottom left pin with the black wire? I would also check on your multimeter for contiuity between the tab where the 3.3v goes, and ground - just to make sure that tab is not also shorting to ground (as its right over the area where the ground is.

Provided you sort that right hand cap, and double check that between 3.3v and ground you dont have a short, and between 5v and ground you dont have a short, you're good to go, but I would consider a bit of tape under the 5v connection on regulator.

Also check your negatives of those 2 electrolytics are on the correct side too (hard to tell from photo). The -ve side of the cap (the striped) needs to connect to ground. EDIT: I think your caps do have the -ive going to the correct sides there. Just that issue of the light blue -ive not connected to gnd at the moment.
 
Last edited:

Broomfield

New Challenger
Joined
May 18, 2016
Posts
57
thanks gadget for pointing that out for me, you were right it wasnt connected properly.

I've gone and redone it and changed first the blue cap position so that the ground leg is touching the ground plate and then I put some electrical tape under the v5 line to make sure its not touching ground. I did a contiunity test and it all looks ok now (I might go back and clean up the connection on the 5v regulator leg as it looks abit messy atm).

Also I took a picture of those two pad positions on the bottom right on the CHA board, the top couple of pads (pads on the left connects to ground) do you think its worth attaching anything there or shall I just leave it? thanks again


changed the blue cap position and put electrical tape under the 5V on the regulator.
ms5 reg 1.jpg

the two empty pads on the CHA (bottom right) worth putting anything there or shall I leave it?
 

Attachments

  • ms5 reg 2.jpg
    ms5 reg 2.jpg
    194.6 KB · Views: 72
  • ms5 reg 2v.jpg
    ms5 reg 2v.jpg
    199.4 KB · Views: 70
Last edited:

GadgetUK

Ace Ghost Pilot
Joined
Sep 27, 2013
Posts
1,323
Looks OK =D I wouldn't bother putting anything in those 2 positions on the bottom right for now. They might be resistor positions or something - not sure, you would need to see where the other end (none ground ends) connect to. Just leave those for now.
 

Broomfield

New Challenger
Joined
May 18, 2016
Posts
57
update:

I put the cart back together and tested it, unfortunately its coming up with blocky graphics. You can see the graphics move but they look all blocky, the sound and music seems fine its just the graphics. Any idea's what the problem could be? maybe its to do with some of the pads, shall I remove some of the 100nf off some of the pads maybe? Or could there be another problem elsewhere to do with voltage or something else?

I also loaded it up with unibios 3.3 and did the crc check (picture below), it all comes up with "NG" except for he last one. Strangely the unibios screen appears to have glitches on the top aswell (neogeo logo is missing).


blocky graphics on screen.
ms5g.jpg

CRCR check, all NG except for last one.
ms5g2.jpg
 
Last edited:

GadgetUK

Ace Ghost Pilot
Joined
Sep 27, 2013
Posts
1,323
The CRC issue can be ignored - that's because it's a bootleg, and the CRC looks correct compared to mine. The issue on the char board (gfx) is possibly due to 3.3v not being enough for the TTL logic on that board. You might need to revert to two diodes. I would try that first, and inspect closely before retesting.
 

GadgetUK

Ace Ghost Pilot
Joined
Sep 27, 2013
Posts
1,323
Please also upload a photo of where you added SMD caps on char board.
 
Last edited:

Broomfield

New Challenger
Joined
May 18, 2016
Posts
57
Please also upload a photo of where you added SMD caps on char board.


thanks gadget, here is the pic of where I added the additional SMD 100nf caps on the CHA board. Let me know if something looks wrong, (this pic was before I fixed the regulator). I'll wait to see your reply before I change the regulator back to the diodes :)

SMD positions added.jpg
 
Last edited:

donluca

Ninja Combat Warrior
Joined
Aug 19, 2015
Posts
529
One suggestion, though: always try to do one modification at time, don't just put like 10 extra caps plus regulators otherwise if you'll end up with issues (like you did) it will be hard to troubleshoot it.

As GadgetUK suggested, try reverting to using diodes and check if the problem is solved. If it doesn't, check all the caps and try removing one at a time to see if something changes.

EDIT: another good idea is to look for the datasheet of those chips to see how much voltage they require in order to work.
 
Last edited:

GadgetUK

Ace Ghost Pilot
Joined
Sep 27, 2013
Posts
1,323
One suggestion, though: always try to do one modification at time, don't just put like 10 extra caps plus regulators otherwise if you'll end up with issues (like you did) it will be hard to troubleshoot it.

As GadgetUK suggested, try reverting to using diodes and check if the problem is solved. If it doesn't, check all the caps and try removing one at a time to see if something changes.

EDIT: another good idea is to look for the datasheet of those chips to see how much voltage they require in order to work.

This ^

I think I would check those caps - test on continuity between ground and one end, you should have a short. On the other end of those caps you should have a short to either to the 5v rail, or the 3.3v rail. If you find one that isn't a bypass position - ie. it doesnt have 1 side as a VCC (3.3v or 5v) and the other side to ground, remove it!
 

Broomfield

New Challenger
Joined
May 18, 2016
Posts
57
update:

You were absolutely right Gadgetuk! those caps were not connecting to ground so I removed those 100nf caps that I previously added onto the CHA board and now the game is fine with no graphics problems at all =)

The voltage regulator is still installed and it all looks good, I havent seen any graphics glitches and it sounds like the crackle noises have gone.

The only time where the crackle noise appears is on the second level when your on the big elevator when those red drone things attack you on the wall, after you defeat them the elevator crashes into the ground and then it makes a crackle noise. I tried it on two occasions and it does it in same place, do you think this could be because the rom is a bootleg? does it do it on your version?

I think what I did originally was when I saw all those empty cap positions on the CHA board I assumed they were bypass caps, but in actual fact I have no idea what these would be used for? I could always add something to them on any of the positions if need be. Any ideas what they could be used for or shall I just leave those SMD cap postions alone on the CHA board?

I've left those 100nf caps on the PROG board, I havent messed with any of those, do you think I should leave them as they are?

thanks very much for your help Gadgetuk :)

metal slug 5.jpgmetal slug 5 2.jpg
 
Last edited:
Top