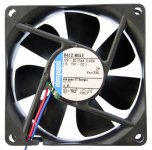
cps2 fan/battery

mainman

CPS2 Person.,
20 Year Member
Joined
Mar 26, 2001
Posts
3,731
You can go this way like on the video that Tyranix95 posted... it is a fix .. but yet again in few years you will have to go over again the soldering procedure.

Or you can go 1 UP and do this : :buttrock:

Get the keystone battery holder and retainer. (around $8)

View attachment 21570

then buy this battery : http://www.ebay.com/itm/1-2AA-Size-...t=US_Single_Use_Batteries&hash=item27c6211e8e

It will cost you about $10-15 in total ... but hey .... cps2 board aint cheap in the first place. Then in few years you just pop the new battery in. Hope this helps you .

Bad ideal, very bad ideal.
 

WupWuh

Krauser's Shoe Shiner
Joined
Jun 5, 2010
Posts
232
I'll have to pick up a few fans from JNX. Got a few noisy A boards that is for sure.

I just changed out 11 CPS2 batteries the other week. I had a pretty good rhythm going with them and everything turned out alright. I had one board that had the keystone holder and desoldering that and replacing it with a battery was a breeze as well.
 

LegoSlug

Over Top Auto Mechanic
Joined
Dec 10, 2012
Posts
864
This has been discussed many times before.

One word, Oxidation.

I think I asked not too long ago. Decided to just solder them straight on. It was fairly easy and I bought the batteries that were linked earlier. I would do the same thing again, as I was fairly happy with how simple it was and how it turned out.

I was also going to suggest JNX for fans, though I have yet to try them.
 

undamned

Pleasure Goal
Joined
Jul 28, 2006
Posts
146
This has been discussed many times before.

One word, Oxidation.
As much as battery holders add a minute amount of electrical resistance and open up opportunity for a battery to come loose (if the latch is not properly secured), I've never ever seen oxidization problems or any other problems with Keystone holders on CPS2. I've done batteries both ways (solder-in and with a holder) and have never experienced anything bad either way. That includes lots of shipping and extreme temperature swings and never had a battery holder pop open or anything.

Just putting that out there because I hear a lot of people dump on the idea of a battery holder and yet my personal experience has been completely trouble free. Now days I usually just do solder-in, simply because that's what other people seem to prefer and if I end up selling the board no one will be put off by the battery style.
-ud
 

DeusVult

Another Striker
Joined
Dec 18, 2013
Posts
319
I just swapped 2 A board fans with new ones I got from jamma nation, amazing difference.

when I was doing this, one of the boards was very clean inside and the other was very dirty, it made me think are these fans intake or exhaust fans, I never checked before I swapped them in, at the moment the are on exhaust
 

Scott

Edo Express Delivery Guy
Joined
Mar 5, 2003
Posts
337
Wow, I'm glad I checked this thread. I never even thought about changing my fan, let alone thinking it would be such an easy fix. Thanks for the heads-up.
 

Ash Burton

Krauser's Shoe Shiner
Joined
Oct 16, 2010
Posts
234
So with the JammaX fans is it just unplug the old and plug in the new? Or do you need to cut the wires?
 

DeusVult

Another Striker
Joined
Dec 18, 2013
Posts
319
So with the JammaX fans is it just unplug the old and plug in the new? Or do you need to cut the wires?

no I had to cut the wires and solder them to the old ones, but the fan plugs into existing slot perfect no need to do anything else
 

Westcb

Give an Azn, A Break Here!,
Joined
May 17, 2012
Posts
1,190
no I had to cut the wires and solder them to the old ones, but the fan plugs into existing slot perfect no need to do anything else


I have used 3 of his fans, I didn't have to solder at all, plug and play. It was a 3 pin plug, but only two wires populated on mine, and it fit on the existing connector fine, maybe he ran out of one kind and started shipping another?
 

DeusVult

Another Striker
Joined
Dec 18, 2013
Posts
319
you might be right, It was a 3 pin but only 2 wires connected but I just cut it because I had in my head from mendels earlier post he had to cut the wires...Doh!!!!
 

Westcb

Give an Azn, A Break Here!,
Joined
May 17, 2012
Posts
1,190
you might be right, It was a 3 pin but only 2 wires connected but I just cut it because I had in my head from mendels earlier post he had to cut the wires...Doh!!!!


Haha yeah, I had to slice and dice when I changed a Naomi fan, atomiswave fan, and a blast psu fan. I was prepared too snip it and then noticed it fit fine :-)
 

Ash Burton

Krauser's Shoe Shiner
Joined
Oct 16, 2010
Posts
234
you might be right, It was a 3 pin but only 2 wires connected but I just cut it because I had in my head from mendels earlier post he had to cut the wires...Doh!!!!

Lol, which is exactly why I asked for verification. Thanks all!
 

kuze

Sultan of Slugs
10 Year Member
Joined
Apr 20, 2013
Posts
2,553
Anyone happen to have the part numbers for the fan connector that plugs into the A board, as well as the right pins that will fit it?

I'd rather crimp my own connector onto an 612FL fan rather than cut one off from a stock fan and splice it together.
 

ReplicaX

Unholy Custom Rank.,
15 Year Member
Joined
Aug 23, 2008
Posts
2,420
Anyone happen to have the part numbers for the fan connector that plugs into the A board, as well as the right pins that will fit it?

I'd rather crimp my own connector onto an 612FL fan rather than cut one off from a stock fan and splice it together.

You don't need to cut them off. Just desolder it at the fan's pcb and solder to the new one, done.

I've done this with CPS2, Sun PSU, and Naomi fans.

Just lift the sticker on the old fan to see the board. Most Papst you can see the pcb connections.
a_papst_8412_ngl_80mm_fan.jpg
 
Last edited:

kuze

Sultan of Slugs
10 Year Member
Joined
Apr 20, 2013
Posts
2,553
You don't need to cut them off. Just desolder it at the fan's pcb and solder to the new one, done.

I've done this with CPS2, Sun PSU, and Naomi fans.

Just lift the sticker on the old fan to see the board. Most Papst you can see the pcb connections.
View attachment 22945

That's not a bad idea, I'll probably just go that route. Still would be cool to know what part #s would make a suitable connector replacement though.

Thanks for the tip!
 

Dinodoedoe

Bub & Bob's Bub,
20 Year Member
Joined
May 21, 2002
Posts
1,681
Top