Brief Summary:
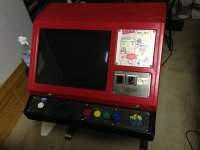
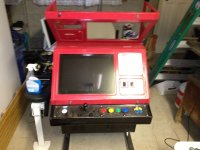
I’ve wanted a Neo Geo for a long time, and have kept an eye out in the local ads for anything in my price range. Everything that came up for sale was either too expensive, or in poor shape. I’m also a Nintendo fan and I recently learned about the Nintendo VS System Table Type “Red Tent” arcade. Within a few days of discovering the Red Tent, an add was posted that offered a Red Tent that was converted into a Neo Geo. I made the purchase and that brings me to the purpose of this posting: my project to refurbish and create a Neo Geo mVS System Table Type.
Side view showing how awesome 2-player mode could be!
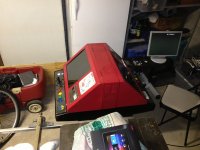
Close-up view of each player's perspective
Initial Impressions:
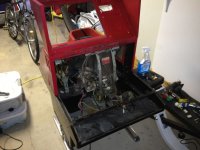
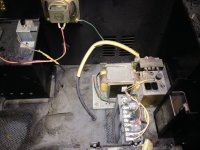
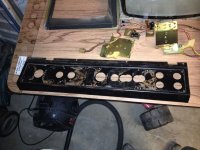
The arcade powers on without problems, but it is dirty and the CRTs have seen better days. I adjusted the RGB monitor pots to calibrate the displays and remove the purple cast, but there are serious problems with the CRT: screen burn-in and the red guns randomly turns off. Playing a game in two-player mode where each person gets their own screen has been fantastic, but the constant colour changes and dim screens eventually ruins the experience. The control panel is in rough shape because the joysticks are loose and sometimes unresponsive, and the modder spaced the buttons too far apart so my hand cramps up while trying to get my fingers to touch all the buttons.
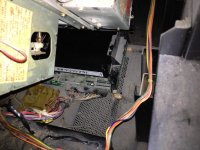
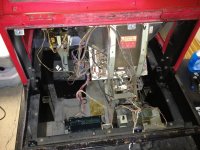
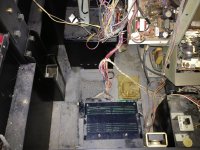
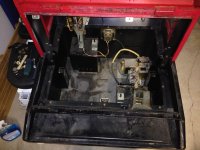
Neo Geo sitting at the bottom covered in grime and dust
Update 1 – LCD Swap:
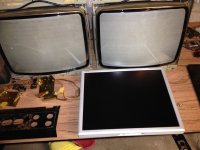
The Red Tent uses 2 custom 18” CRT displays that are difficult to source. I’d also like to claim more interior space for other internal plans, so swapping out the CRTs for LCDs is my goal. Another point to mention is that I’m not comfortable with sticking my arms close to the CRT danger zone every time I want to swap Neo Geo games, so I would feel safer dealing with LCDs.
Part 1 – CGS8820 (GCA-to-VGA) - $36
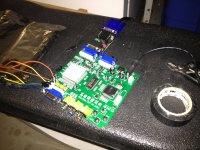
I’m on a tight budget, so instead of buying 2 expensive LCDs that support CGA inputs, I instead bought a CGA-to-VGA converter along with 2 generic 1280x1024 LCDs. I ordered the part from Ebay and upon delivery I disconnected the arcade video cables and modded them to send the signal to the converter. I did a proof of concept and everything worked.
CGA converter and scanline generator proving their worth
Part 2 - SLG2 (scanline generator) - $36
I personally don’t like the look of retro games on LCDs. I don’t like how they get scaled, and I don’t like all the artifacts that appear. I ordered the SLG2 to help make the display look like a CRT. To me the image appears sharper and less distorted with the SLG2. I feed the SLG2 a 640x480 signal and the result is good.
See pics below for a "On" and "Off" comparison.
Scanlines ON:
Scanlines OFF:
Part 3 – NEC LCD - $40
I wanted a LCD that is the proper ratio (4x3) so I looked for a 19” 1280x1024 screen. I sourced a model through a private sale and am happy with the purchase. The first problem that I noticed is a message that gets displayed every time that it is turned on and connected to the CGA-to-VGA converter: not ideal 1280 x 1024 image. I have to press the Menu button to make the message disappear. Maybe I can rig an arcade button to be the menu button? The second problem that I noticed is the lack of black/white detail. I can barely drive a car in the ice level of Neo Drift Out because its hard to distinguish between the road and the shoulder. I’ll need to invest in a higher quality LCD for screen #2.
I’ve wanted a Neo Geo for a long time, and have kept an eye out in the local ads for anything in my price range. Everything that came up for sale was either too expensive, or in poor shape. I’m also a Nintendo fan and I recently learned about the Nintendo VS System Table Type “Red Tent” arcade. Within a few days of discovering the Red Tent, an add was posted that offered a Red Tent that was converted into a Neo Geo. I made the purchase and that brings me to the purpose of this posting: my project to refurbish and create a Neo Geo mVS System Table Type.
Side view showing how awesome 2-player mode could be!

Close-up view of each player's perspective
Initial Impressions:
The arcade powers on without problems, but it is dirty and the CRTs have seen better days. I adjusted the RGB monitor pots to calibrate the displays and remove the purple cast, but there are serious problems with the CRT: screen burn-in and the red guns randomly turns off. Playing a game in two-player mode where each person gets their own screen has been fantastic, but the constant colour changes and dim screens eventually ruins the experience. The control panel is in rough shape because the joysticks are loose and sometimes unresponsive, and the modder spaced the buttons too far apart so my hand cramps up while trying to get my fingers to touch all the buttons.
Neo Geo sitting at the bottom covered in grime and dust
Update 1 – LCD Swap:
The Red Tent uses 2 custom 18” CRT displays that are difficult to source. I’d also like to claim more interior space for other internal plans, so swapping out the CRTs for LCDs is my goal. Another point to mention is that I’m not comfortable with sticking my arms close to the CRT danger zone every time I want to swap Neo Geo games, so I would feel safer dealing with LCDs.
Part 1 – CGS8820 (GCA-to-VGA) - $36
I’m on a tight budget, so instead of buying 2 expensive LCDs that support CGA inputs, I instead bought a CGA-to-VGA converter along with 2 generic 1280x1024 LCDs. I ordered the part from Ebay and upon delivery I disconnected the arcade video cables and modded them to send the signal to the converter. I did a proof of concept and everything worked.
CGA converter and scanline generator proving their worth
Part 2 - SLG2 (scanline generator) - $36
I personally don’t like the look of retro games on LCDs. I don’t like how they get scaled, and I don’t like all the artifacts that appear. I ordered the SLG2 to help make the display look like a CRT. To me the image appears sharper and less distorted with the SLG2. I feed the SLG2 a 640x480 signal and the result is good.
See pics below for a "On" and "Off" comparison.
Scanlines ON:
Scanlines OFF:
Part 3 – NEC LCD - $40
I wanted a LCD that is the proper ratio (4x3) so I looked for a 19” 1280x1024 screen. I sourced a model through a private sale and am happy with the purchase. The first problem that I noticed is a message that gets displayed every time that it is turned on and connected to the CGA-to-VGA converter: not ideal 1280 x 1024 image. I have to press the Menu button to make the message disappear. Maybe I can rig an arcade button to be the menu button? The second problem that I noticed is the lack of black/white detail. I can barely drive a car in the ice level of Neo Drift Out because its hard to distinguish between the road and the shoulder. I’ll need to invest in a higher quality LCD for screen #2.
Last edited:

