The bad battery thread

jesesfbi

Ninja Combat Warrior
Joined
Jan 23, 2012
Posts
525
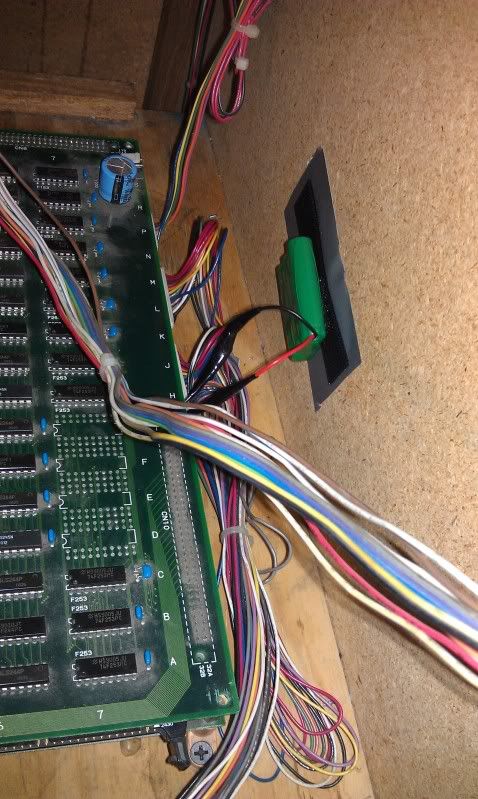
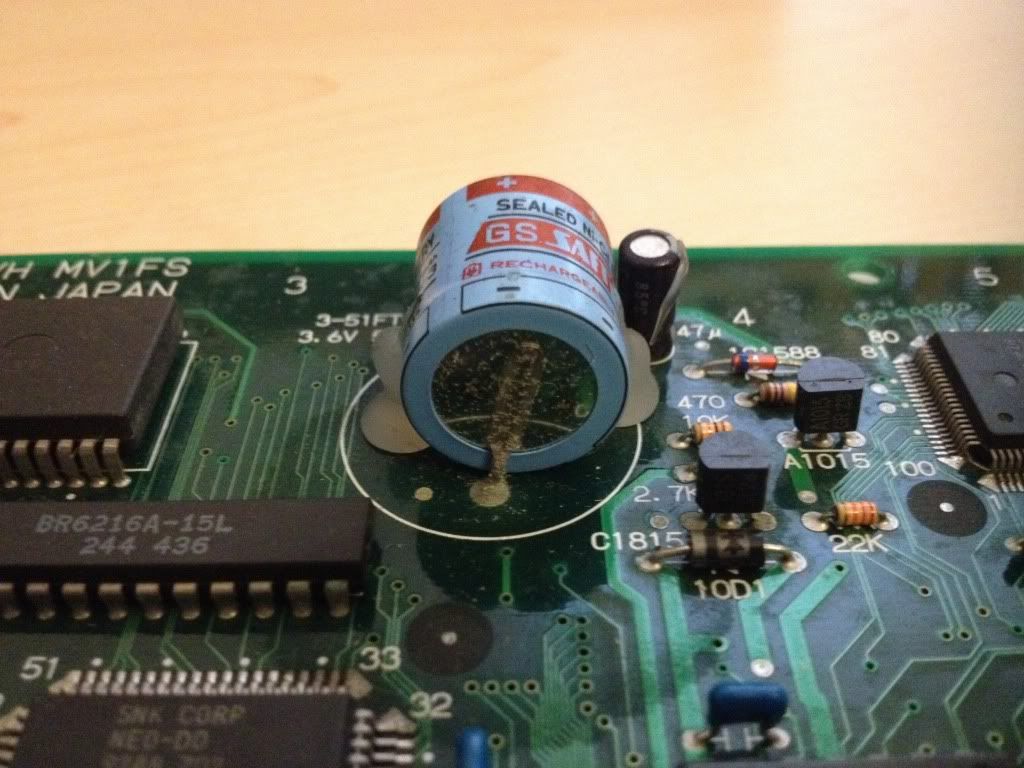
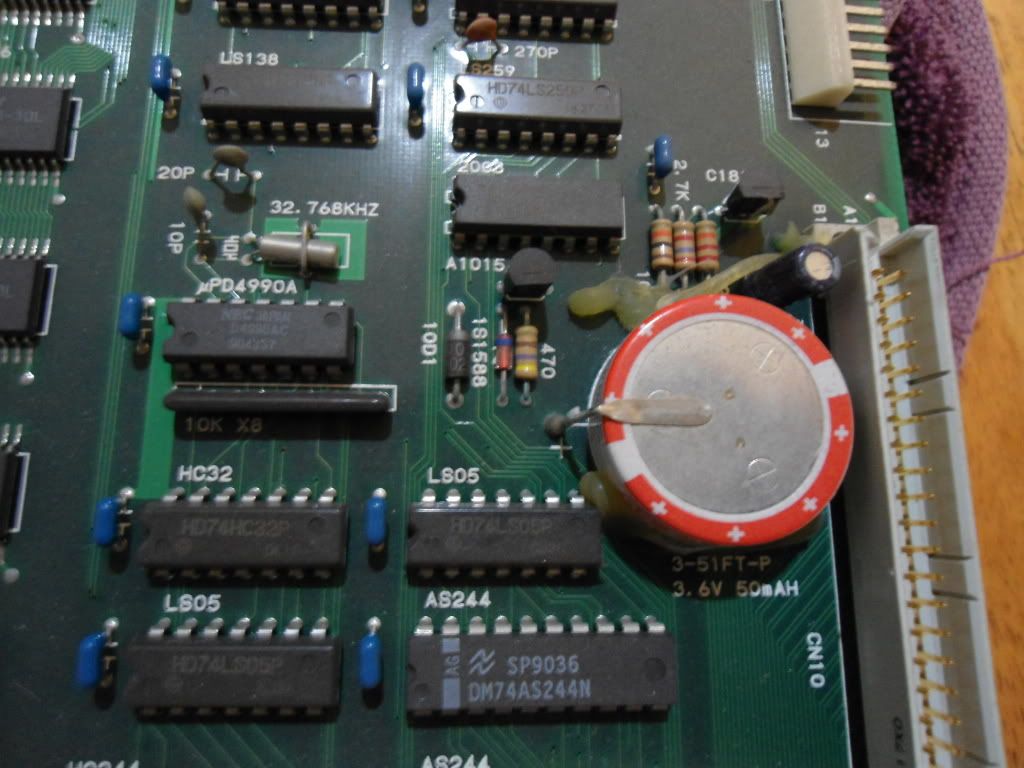
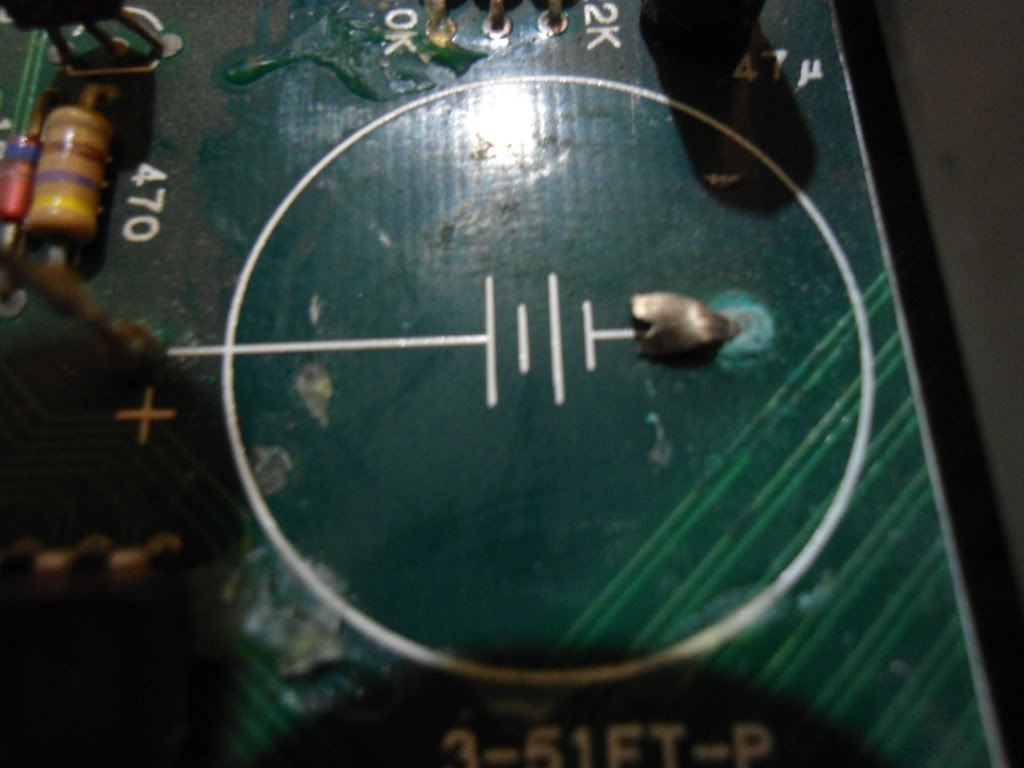
I got a question to the people who converted the MVS board battery to the CR2032 one I know the Sega Saturns used the exact same thing and I have a few broken ones laying around do you think I can rip those out and put it in? and I'm sorry i didn't read the whole thing but is that MVS board battery a 3volt batter?
 

Xian Xi

JammaNationX,
15 Year Member
Joined
Dec 1, 2005
Posts
27,750
Yup 3V, as long as the battery holder is the same size as the battery, if not you can use a bigger 3v battery that fits the saturn battery holder.
 

jesesfbi

Ninja Combat Warrior
Joined
Jan 23, 2012
Posts
525
thank you Xian Xi. the Saturn battery holder is exactly the size for the CR2032 battery. BTW I love the work you do you are an inspiration to building a CMVS
 

dragonpt

Over Top Auto Mechanic
10 Year Member
Joined
Oct 19, 2008
Posts
867
Great info, I just purchased a 4 slot that is stuck on the cross of death screen. The boards are really dirty but after reading this I decided to check the battery.
Looked ok from the top but after reading the tread and discovering all its needed for is high scores I decided to remove it any way
DSC00186.jpg


After removal found the back had started to corrode so good thing :)
DSC00188.jpg


Fingers crossed that a good clean will get the board going again
Yeah its the same bat, like in my mv-4f.
updates on that bat replacement?

i choose for put the bat away from the boards, with 20cm of wire.

in case it goes bad, atleast the boards are safe
 

Jedah Doma

Chroma Ma' Doma!,
Joined
Jun 5, 2004
Posts
9,902
So it's alright to remove my battery on my 6-slot as it only handles high scores? If so I'm taking that bad boy out pronto.
 

malignantpoodle

Robert Garcia's Butler
Joined
Aug 21, 2010
Posts
1,281
So it's alright to remove my battery on my 6-slot as it only handles high scores? If so I'm taking that bad boy out pronto.

Well, it also handles your settings for each game as well (i.e. demo sound on/off, number of lives, difficulty level, etc) but yeah without a battery cab will still function.
 
Last edited:

Lan Di

War Room Troll
Joined
Jan 29, 2012
Posts
204
I didnt bother taking a photo of the original stock battery because it did not have a leak. however, I did decide to change the battery because of all the horror stories going around concerning leaking batteries destroying PCBs.

IMAG0085.jpg
 

mohawk33

n00b
Joined
Jan 7, 2012
Posts
44
does anybody know about the internal dreamcast battery? could this battery leak too and destroy the board?
 

HeavyMachineGoob

My poontang misses Lenn Yang's wang
10 Year Member
Joined
Apr 3, 2011
Posts
5,843
does anybody know about the internal dreamcast battery? could this battery leak too and destroy the board?

It will leak eventually, much like any other kind of battery used in applications like this. However I don't think there's much surrounding the battery that could be damaged, aside from maybe the controller PCB.

In the case of home consoles though, the battery will be dead long before it starts leaking, so you'd probably notice it before anything bad were to happen.
 

Ninjatemper

King's Dry Cleaner
Joined
Jul 15, 2010
Posts
386
It will leak eventually, much like any other kind of battery used in applications like this. However I don't think there's much surrounding the battery that could be damaged, aside from maybe the controller PCB.

In the case of home consoles though, the battery will be dead long before it starts leaking, so you'd probably notice it before anything bad were to happen.

I assume the Dreamcast will still work fine if you cut the leads and remove the battery completely without replacing it right?
 
Joined
Jun 1, 2012
Posts
8
Just read through this entire thread thus far and found it very interesting. When I get home tonight I am going to remove my battery good or otherwise.

I do not have a soldering station at the moment, but as the board will work fine without it I will live without high scores and settings until I can solder in a cr2032 and remove the 470 resister.

Thanks all!

Further to my note above I checked out my battery and this is what I found. I'll be looking for some cleaning materials to try to clean up the marks/stains on the board.

29991dc9.jpg
 
Last edited:
Joined
Jun 6, 2012
Posts
12
Just picked up a new red cab w/o motherboard, biggups to all who contributed on this thread, as now I can watch out for leakage on the new MVS. Invaluable thread guys!
 

thomas3120

n00b
Joined
Aug 12, 2012
Posts
4
Battery placement on MVS MV-1 (2 solder pads on positive side)

Hello, Couldn't create my own post yet so responded to this thread on batteries.

Attempting to fix an early MVS MV-1. Just got my UniBios & battery in the mail today.
Had a quick question on the battery on my MVS MV-1.
When I took the old battery out (NM-Cd 3.6V) I forgot to write down or take a picture of how it went back in as there are 2 adjacent solder pads on the positive side.
Just wondering if anyone that has the MV-1 1 slot MVS could take a quick look at which solder pad hole the positive leg of the battery goes into.

The solder pad closest to the battery appears to go through the mainboard to the back or solder side but nowhere else (but not 100% sure).
The solder pad closer to the small 47uF cap (farthest away from battery) appears to be connected to the rest of the circuit.

Here's a pic:
MV1Battery.jpg
 

Kid Panda

The Chinese Kid
Joined
Jun 13, 2010
Posts
12,514
doesnt he need to cut something as well on that board, so not to make the battery explode? or are you using the same type of battery?
 

Xian Xi

JammaNationX,
15 Year Member
Joined
Dec 1, 2005
Posts
27,750
doesnt he need to cut something as well on that board, so not to make the battery explode? or are you using the same type of battery?

He needs to disable the charging circuit if he is planning on using a non-rechargeable battery.
 

Fortune

Zero's Secretary
Joined
Jun 30, 2012
Posts
151
On my MV-1, the two positive points were not connected unlike the MV-2F boards I have.

Since the CR2032 battery holder goes into the inner solder point, I had to make a small bead of solder to connect them.
 

KaPH33n

Sieger's Squire
Joined
Jan 28, 2010
Posts
819
On my MV-1, the two positive points were not connected unlike the MV-2F boards I have.

Since the CR2032 battery holder goes into the inner solder point, I had to make a small bead of solder to connect them.

a small bead of solder is hardly ever the best way to bridge two points. only time i would recommend this is if the distance you are spanning is less than the diameter of whatever wire you have on hand.
 

Fortune

Zero's Secretary
Joined
Jun 30, 2012
Posts
151
a small bead of solder is hardly ever the best way to bridge two points. only time i would recommend this is if the distance you are spanning is less than the diameter of whatever wire you have on hand.

The two rings are nearly touching already.
 

Xian Xi

JammaNationX,
15 Year Member
Joined
Dec 1, 2005
Posts
27,750
Forgot on an MV1 they aren't touching especially on the slide dip ones. I use the one on the left anyway which is connected to the circuit. But like mentioned, a small bead of solder can be used since they are less than 1mm away from one another.
 

thomas3120

n00b
Joined
Aug 12, 2012
Posts
4
Just checked a few things out. There's no continuity between the 2 adjacent solder pads on the positive side.
The battery I'm using is a re-chargeable VARTA (3/ V80H) (green plastic cover), 3.6V and 70mAh. It's also a Ni-MH instead of the original Ni-Cd.
I'm still waiting on my JAMMA harness so haven't powered anything yet.
I went ahead and used the positive battery pin to join those 2 adjacent solder pads. Is this ok?
Also, a bit more info on my board:
NEO-MVH MV1 (if this helps any)

t
 
Last edited:
Top