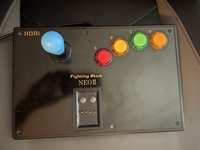
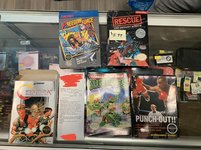
No mod is needed. Just put them in. However, looking for the right 30mm buttons was a chore as I didn't want something that felt mushy. The original buttons felt slightly better than the AES stick buttons but both felt hollow. Also over time, the AES stick's buttons felt dry and had a squeak. You'd need to grease those. So in referencing both of those, I needed something more and better. The PS-14-K's came with an option to insert tension springs. I assume other buttons have the same option, but since these are Seimitsu, it made sense here. Now, in the pic where the red arrows are, the terminals are not positioned side by side like the originals. So I improvised some wiring from the buttons to the PCB. Adding tension springs here makes a world of difference and is a preferred alternative to not having microswitches in them.
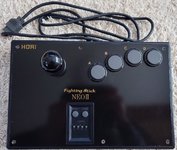
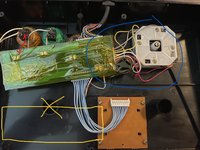
The connector from the joystick limits my spacing as seen in the blue circle. I could have cut those and added wiring to give me more space to maneuver the PCB around but I didn't want to do all that it would've made things look a little organized and cleaner. When I took apart the balltop, I wondered if there was a way to design the square gate and turn it into an octogate as there isn't any on the net. I do have a 3D printer still new in the box and I need to learn it but maybe I can create something here. I am a fan of square gates but octo's feel better as I have JNX ones in 2 out of the 3 AES sticks I have modded. The battop added here came with a screw adapter so it's that simple to replace.
PCB is held there by kapton tape on the piller and of course, I put some on the back so it doesn't short against the metal plate. In the yellow outline, my original idea was to remove that pillar, place the PCB after the extensions, and add Suzo Happ buttons. To do that, I would have to cut down the buttons, and carefully reglue the length I needed so it would turn the button into short throws and have enough space for the microswitch. That may be something I might do with this stick in the future, or I may buy a NEO I and do it since I have a NEO II already. I truly like the weight of this stick as well. Something the AES sticks are lacking.
.jpeg")